Best Seed Starting Kits for Beginners: From Trays to Grow Lights (2026 Guide)
Start your garden indoors with confidence using the best seed starting kits, heat mats, and full-spectrum LED grow lights for vigorous seedlings.
Disclosure: This post contains affiliate links. As an Amazon Associate, we earn from qualifying purchases at no extra cost to you. We only recommend products we believe are genuinely useful for home food preservation.
Every bountiful autumn pantry, whether lined with sparkling jars of home-canned marinara sauce or stocked with vacuum-sealed bags of sweet corn, begins months earlier with a handful of tiny dry seeds. For passionate gardeners and homesteaders, starting seeds indoors late in winter is one of the most rewarding rituals of the entire agricultural year.
Starting your own vegetables from seed indoors gives you access to thousands of extraordinary heirloom varieties that commercial garden centers and big-box nurseries never carry. Instead of settling for whatever generic hybrid tomato seedlings happen to sit on a nursery shelf in May, you can cultivate intensely flavorful heritage beefsteaks, delicate French breakfast radishes, Hungarian paprika peppers, and rare Italian storage squashes specifically bred for home food preservation.
Furthermore, growing from seed reduces your garden budget dramatically. A single commercial seedling in a four-inch plastic pot frequently retails for four or five dollars. For that identical price, a single seed packet provides fifty to one hundred seeds, yielding hundreds of pounds of homegrown organic produce.
However, for beginners attempting seed starting on an indoor windowsill, initial experiences can be discouraging. Windowsill light in February and March is rarely strong enough for vigorous growth, resulting in tall, pale, fragile seedlings that collapse under their own weight. Inadequate soil warmth delays germination by weeks, while damp, stagnant air invites fungal pathogens that cause damping-off disease overnight.
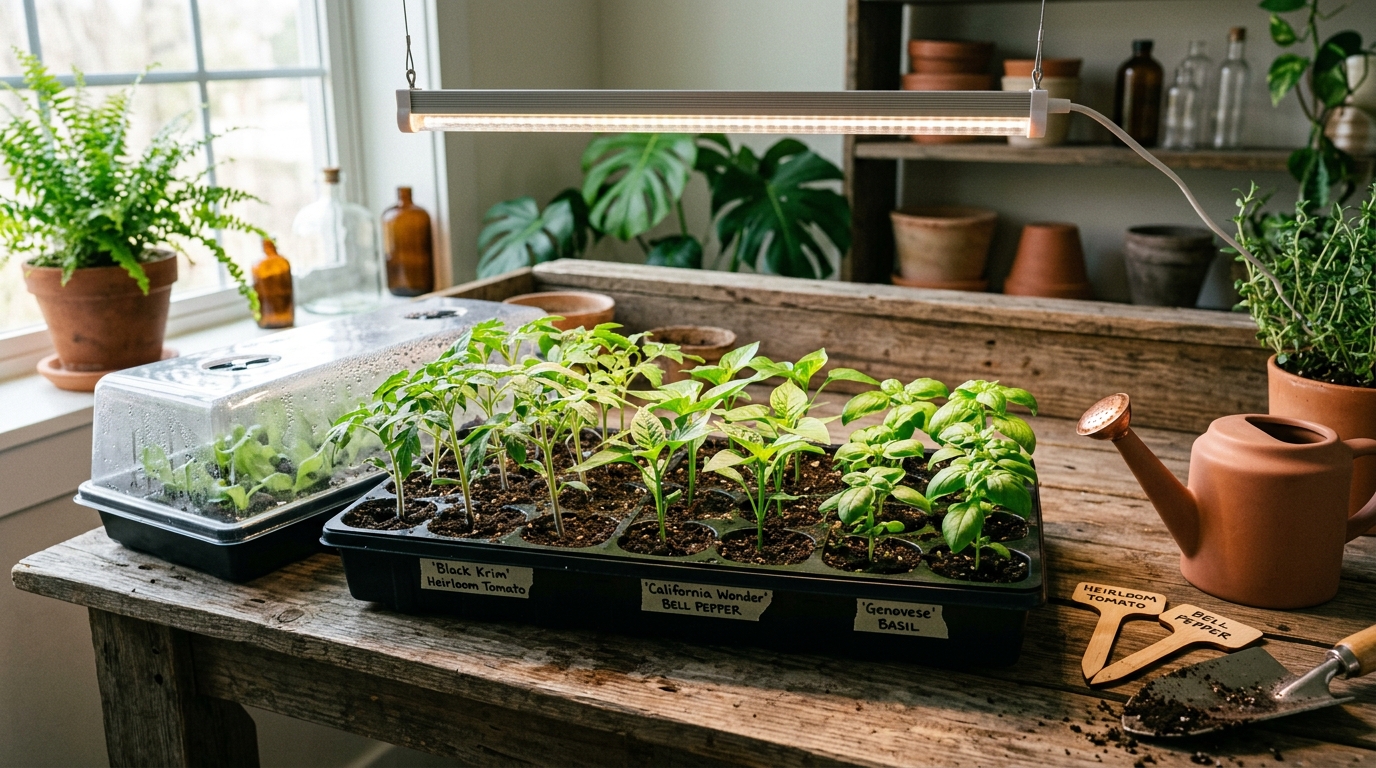
Modern seed starting equipment completely eliminates these frustrations. By combining modular cell trays, precision humidity domes, waterproof seedling heat mats, and full-spectrum LED grow lights, you can create a perfectly controlled microclimate that yields stocky, dark-green, robust seedlings ready to thrive the moment spring soil warms.
This comprehensive guide evaluates the best seed starting kits available today, breaks down the biological science of germination, provides essential soil temperature charts, and shares battle-tested indoor growing protocols to ensure your gardening season starts with triumphant success.
The Biological Science: What Seeds Actually Need to Wake Up
To understand why specialized seed starting gear produces dramatically superior results compared to improvised egg cartons or paper cups, one must examine the physiological triggers that govern seed germination.
A seed is an embryonic living plant held in metabolic suspension, encased inside a protective seed coat and packed with a stored food reserve known as the endosperm. In nature, seeds remain dormant until environmental conditions guarantee that a sprouted seedling has a high probability of survival.
Four environmental catalysts regulate this awakening:
- Moisture (Imbibition): The dry seed coat absorbs water through a microscopic pore called the micropyle. This hydration swells the internal embryo and activates respiratory enzymes that break down stored starches into usable metabolic energy. The growing medium must remain evenly moist like a wrung-out sponge; soggy, waterlogged soil deprives the seed of necessary oxygen, causing seeds to rot before sprouting.
- Soil Warmth (Thermal Activation): Soil temperature is the primary metabolic throttle for germination. While cool-season greens like spinach and lettuce germinate in cool soil, warm-season nightshades like tomatoes, bell peppers, and eggplants require root-zone temperatures between seventy-five and eighty-five degrees Fahrenheit to activate critical gibberellic acid hormones.
- Oxygen (Gas Exchange): Germinating seeds respire rapidly. Heavy garden topsoil from your yard compacts in small indoor containers, suffocating roots. Successful seed starting requires a light, porous, soilless medium that holds both capillary water and open oxygen channels.
- Intense Light (Post-Germination): While most vegetable seeds germinate in darkness beneath the soil surface, the exact millisecond the embryonic shoot breaks through the dirt, light requirements become urgent. Chlorophyll synthesis begins immediately. Without intense, direct overhead illumination, seedlings stretch desperately upward, developing spindly, weak stems with microscopic cellular walls that snap during outdoor transplanting.
Horticultural Extension Rule on Soil Temperature: Ambient room air temperature is not the same as soil temperature. Evaporation from moist potting soil cools the root zone by five to ten degrees below room air. Using a waterproof seedling heat mat provides consistent bottom warmth, accelerating tomato and pepper germination from three weeks down to five or six days while virtually eliminating seed rot.
For preservers planning their garden around winter food security, learn how garden crop timing ties into home storage in our comprehensive guide on How to Build a More Resilient Home Food Supply.
Detailed Evaluation: The Best Seed Starting Kits for Beginners
We evaluated dozens of indoor propagation systems based on cell durability, drainage design, humidity dome height, light spectrum quality, thermal safety, and overall value. The three systems below represent the finest options for beginners and experienced growers alike.
1. Best All-in-One Kit: Growfriend Seed Starter Kit with LED Grow Lights
Growfriend Seed Starter Kit with LED Grow Lights
Best for: Beginners who want built-in full-spectrum grow lights and adjustable humidity domes
- Integrated full-spectrum LED grow light on each dome
- Adjustable circular humidity vents
- Clear cell trays allow root growth monitoring
- Drainage holes prevent waterlogging
- Light cables require USB power brick
For beginners who want an all-inclusive, plug-and-play solution without purchasing separate light stands, bulky hanging fixtures, and complicated timers, the Growfriend Seed Starter Kit with Integrated LED Grow Lights is the single most convenient indoor setup available.
Performance Analysis and Design Highlights
This modular kit includes multiple twelve-cell propagation trays, sturdy base water reservoirs, high-domed transparent covers, and specialized full-spectrum LED circular light discs that mount directly into the apex of each humidity dome.
The genius of this design lies in its integrated vertical architecture:
- Full-Spectrum LED Circular Lamps: Each humidity dome features a centered circular light fixture equipped with balanced daylight white, blue, and red light diodes. Blue light wavelengths (450 nanometers) stimulate compact vegetative foliage and thick, sturdy stems, preventing leggy growth. Red wavelengths (660 nanometers) support strong root expansion and early cellular photosynthesis.
- Smart Multi-Level Dimming and Timing: The included USB controller features four adjustable brightness settings (twenty-five, fifty, seventy-five, and one hundred percent intensity) alongside automated cyclical timers for four, eight, twelve, or sixteen hours of daily illumination. You simply set the timer once, and the lights turn on and off automatically at the identical time every day.
- Adjustable Humidity Vents: The top of each transparent dome includes a rotating circular vent dial with four openings. During early germination, keep the vents closed to trap maximum relative humidity (around ninety percent). Once green cotyledons emerge, rotate the dial to increase airflow, preventing mildew while gradually hardening the young foliage.
- Clear Root-Inspection Cells: Unlike traditional black plastic cell inserts, the KTOJOY individual cell trays are molded from crystal-clear, durable polymer. This allows you to lift the cell tray out of the solid base and visually inspect root development, checking moisture levels and confirming when plants are fully root-bound without disturbing delicate root hairs.
The bottom base tray is solid and leak-proof, allowing you to practice bottom-watering. Pouring water directly into the base tray allows the potting mix to draw moisture upward through bottom drainage holes by capillary action, keeping seedling foliage bone-dry and completely stopping surface damping-off fungal disease.
2. Best for Rapid Germination: VIVOSUN Waterproof Seedling Heat Mat
VIVOSUN Waterproof Seedling Heat Mat
Best for: Accelerating seed germination by warming root zone 10 to 20 degrees above ambient temperature
- MET safety certified and IP67 waterproof
- Even heating across the entire multi-layer surface
- Crucial for warm-season tomatoes and peppers
- Energy efficient 17.5 watt power draw
- Thermostat controller sold separately
If you have ever waited twenty-one days for stubborn hot pepper seeds or heirloom tomatoes to sprout on a chilly kitchen counter, only to discover that half the seeds decayed into mush, a professional seedling heat mat will transform your gardening life forever. The VIVOSUN Waterproof Seedling Heat Mat is the trusted industry benchmark for reliable bottom warmth.
Performance Analysis and Horticultural Impact
The VIVOSUN heat mat is engineered from heavy-duty, multi-layered flexible PVC encasing an insulated alloy heating wire that runs in continuous serpentine loops across the entire surface. This continuous wiring eliminates cold spots, radiating gentle, uniform thermal energy upward through the base of any standard seed tray.
Key engineering advantages include:
- Targeted Thermal Elevation: Warms the root zone ten to twenty degrees Fahrenheit (six to eleven degrees Celsius) above ambient room temperature. If your basement or spare bedroom sits at sixty-five degrees, the soil inside your seedling cells warms to a balmy seventy-five to eighty-five degrees, the exact optimal metabolic trigger for warm-season garden crops.
- Rugged Waterproof Durability: Rated to IP67 waterproof standards. You can spill water, moist soil, and liquid seaweed fertilizer directly across the mat surface without any electrical hazard. Cleaning requires nothing more than wiping the smooth vinyl surface with a damp sponge.
- Energy-Efficient Continuous Operation: Drawing only seventeen and a half watts of power for a standard ten-by-twenty-inch single-tray mat, running this unit twenty-four hours a day costs merely pennies per week.
- MET Safety Certification: The electrical wiring meets strict UL and MET standards, featuring fire-retardant internal construction that gives home preservers complete peace of mind when operating continuously indoors.
When and How to Use the Heat Mat
Place your seeded cell trays directly on top of the heat mat the moment you finish initial watering. Cover with the humidity dome. The bottom heat accelerates cellular division dramatically:
- Tomato seeds sprout in three to five days instead of twelve days.
- Sweet and hot peppers sprout in seven to nine days instead of three weeks.
- Cucumbers, melons, and summer squash emerge in forty-eight hours.
The Golden Rule of Heat Mats: The moment fifty percent of the seedlings in a tray show green leaves above the soil surface, turn off and remove the heat mat. Leaving seedlings on high bottom heat once foliage emerges encourages rapid, leggy stem elongation and dries out root systems prematurely.
3. Best Budget Classic: Jiffy 72-Cell Seed Starting Greenhouse with Peat Pellets
Jiffy 72-Cell Seed Starting Greenhouse with Peat Pellets
Best for: Zero-transplant-shock gardening using expandable peat pellets
- Biodegradable peat pellets eliminate transplant root shock
- Expands rapidly with warm water
- Includes clear humidity dome
- Proven track record for decades
- Pellets can dry out quickly without close monitoring
For generations of home gardeners, the Jiffy 72-Cell Peat Pellet Greenhouse has represented the classic, dependable entry point into indoor propagation. If you seek an economical, mess-free system that completely avoids the chore of scooping bags of loose potting soil across your kitchen counter, Jiffy remains an outstanding choice.
Performance Analysis and Design Highlights
The Jiffy kit consists of a sturdy watertight base tray, a clear humidity dome, and seventy-two compressed, dehydrated peat discs held together by ultra-fine biodegradable mesh netting.
The operational workflow is delightfully simple and remarkably clean:
- Effortless Warm-Water Expansion: Pour warm water directly into the base tray. Within ten to fifteen minutes, the small dry discs absorb the liquid and expand vertically to seven times their original height, transforming into plump, moist planting cylinders ready for seeds.
- Zero Root Disturbance: The greatest hazard in transplanting young garden seedlings is tearing delicate feeder roots when dislodging them from rigid plastic cells. With Jiffy pellets, the biodegradable mesh contains the entire root ball. When planting time arrives, you plant the entire peat cylinder directly into your outdoor garden bed or raised garden container with zero transplant shock.
- Sphagnum Peat Moisture Balance: Canadian sphagnum peat moss holds exceptional moisture while maintaining naturally high pore space, providing young root tips with continuous hydration and oxygen.
While peat pellets dry out somewhat faster than loose potting mix inside deep plastic cells, placing this kit under a quality grow light produces beautiful, sturdy seedlings with minimal upfront financial investment.
Technical Comparison: Evaluating the Seed Starting Options
To help you match the right equipment to your gardening space and budget, the comparison table below highlights the key specifications, capacities, and capabilities of each system:
| Feature / Specification | Growfriend LED Tray Kit | VIVOSUN Heat Mat Setup | Jiffy 72-Cell Greenhouse |
|---|---|---|---|
| System Style | All-in-One Modular System | Specialized Thermal Mat | Traditional Peat Greenhouse |
| Cell Capacity | 60 Cells (5 Trays of 12) | Fits 1 Standard Flat (72 cells) | 72 Compact Peat Pellets |
| Lighting Included? | Yes (Integrated Full-Spectrum LEDs) | No (Requires external lights) | No (Requires external lights) |
| Automated Timer | Yes (4, 8, 12, 16 Hour Cycles) | Manual (Or optional thermostat) | None |
| Bottom Heat Included? | No | Yes (10°F to 20°F Soil Boost) | No |
| Cell Inspection | Clear Plastic (Root-viewing) | Depends on tray used | Netting-wrapped pellets |
| Reusability | Multiple Seasons (Washable plastic) | Many Years (Heavy-duty PVC) | Tray reusable; refill pellets needed |
| Transplant Method | Pop out root ball cleanly | Depends on tray used | Plant entire pellet directly |
| Best Suited For | Tabletop & Windowsill Growers | Dedicated Gardeners & Peppers | High-Volume Budget Gardeners |
Seed Germination Temperature Reference Guide
Different garden crops have evolved in distinct climatic zones. Attempting to germinate warm-season summer crops at cool temperatures guarantees failure, while cool-season spring crops will actually enter thermal dormancy if soil is overly hot.
Use this university-tested temperature guide to dial in your indoor setup:
| Garden Vegetable Crop | Minimum Temp (°F) | Optimal Germination Range (°F) | Days to Sprout at Optimal Temp | Heat Mat Recommended? |
|---|---|---|---|---|
| Heirloom Tomatoes | 50°F | 75°F to 85°F | 4 to 6 Days | Yes (Essential) |
| Sweet & Hot Bell Peppers | 60°F | 80°F to 88°F | 6 to 9 Days | Yes (Mandatory) |
| Eggplant | 60°F | 80°F to 90°F | 5 to 8 Days | Yes (Essential) |
| Cucumbers & Melons | 60°F | 80°F to 85°F | 3 to 4 Days | Yes (Quick boost) |
| Zucchini & Summer Squash | 60°F | 75°F to 85°F | 3 to 5 Days | Yes (Quick boost) |
| Broccoli & Cauliflower | 40°F | 65°F to 75°F | 4 to 6 Days | No (Ambient room temp) |
| Cabbage & Kale | 40°F | 65°F to 72°F | 4 to 5 Days | No (Ambient room temp) |
| Lettuce & Salad Greens | 35°F | 60°F to 68°F | 2 to 4 Days | No (Heat inhibits sprouting) |
| Basil & Tender Herbs | 50°F | 70°F to 75°F | 5 to 7 Days | Optional |
| Onions & Leeks | 35°F | 65°F to 75°F | 5 to 8 Days | No (Prefers cooler soil) |
Step-by-Step Indoor Seed Starting Protocol
Achieving high germination rates and growing sturdy seedlings requires following an orderly sequence of cultural practices. Follow this field-tested protocol from initial seeding to outdoor transplanting.
Step 1: Selecting and Hydrating the Potting Medium
Never use outdoor garden soil or heavy bagged topsoil in seed starting trays. Garden soil contains clay that packs tightly inside small cells, choking young roots, alongside weed seeds and fungal spores.
Always choose a sterilized, finely milled soilless seed starting mix composed of:
- Sphagnum peat moss or coconut coir for moisture retention.
- Horticultural perlite or vermiculite for drainage and aeration.
- A mild organic wetting agent.
Place your dry seed starting mix into a clean plastic tub. Add warm water gradually, tossing and mixing with your hands until the soil is uniformly damp. When you squeeze a fistful of soil, it should hold its shape without dripping water between your knuckles. Pre-moistening the mix prevents dry hydrophobic pockets that shed water later.
Step 2: Filling Cells and Sowing Seeds
Pack the pre-moistened mix into your cell trays, tapping the tray gently against your potting table to settle the soil. Press lightly with your fingertips to eliminate large air cavities, but avoid packing the medium like concrete.
- Seeding Depth Rule: A universal botanical guideline is to bury seeds to a depth equal to two to three times their thickness. Tiny seeds like basil, petunias, or oregano need only a dusting of soil, while large seeds like squashes or beans are planted one-half to one inch deep.
- Sowing Redundancy: Sow two seeds per cell. If both germinate, snip the weaker seedling off at the soil surface using fine embroidery scissors after the first true leaves appear. Never pull the extra seedling out with your fingers, as doing so tears the delicate root system of the surviving plant.
Step 3: Moisture, Heat, and the Humidity Dome
Gently mist the surface of the soil with a spray bottle to settle seeds without dislodging them. Place your Growfriend clear humidity dome over the tray.
Set the tray on your VIVOSUN seedling heat mat in a warm room. The humidity dome creates a tropical terrarium effect, trapping evaporating water so you will rarely need to add water during the first week. Inspect the trays daily for the first green loops emerging through the soil.
Step 4: The Critical Light Transition
The moment green shoots emerge, remove the tray from the heat mat and place it directly beneath your grow lights.
- Photoperiod (Duration): Seedlings require fourteen to sixteen hours of continuous, bright light every day, followed by eight hours of total darkness. Plants perform essential cellular repairs and metabolic respiration during dark periods; leaving grow lights on twenty-four hours a day stresses the plants.
- Light Distance: Keep full-spectrum LED fixtures positioned close to the foliage. With low-heat LEDs like the Growfriend system, maintaining two to four inches of clearance between the top leaves and the light source ensures maximum photosynthetic energy without heat scorch. If using higher-wattage shop lights, maintain six to twelve inches of clearance. Raise the lights gradually as the seedlings grow taller.
Step 5: Bottom-Watering Technique
Surface watering with a heavy watering can washes seeds away and splashes fungal spores onto delicate stems. Master the art of bottom-watering:
- Pour half an inch of room-temperature water directly into the solid bottom base tray.
- Let the cell trays sit in the water for twenty to thirty minutes. The dry potting soil draws water upward through bottom drainage holes like a sponge wick.
- Once the top surface of the soil turns dark and moist, dump out any excess standing water from the base tray. Roots need oxygen; sitting in stagnant water for days rots root tips.
- Allow the surface of the soil to dry slightly between waterings before adding more water.
Step 6: Gentle Airflow and Stem Strengthening
In outdoor gardens, natural breezes bend young plants back and forth. This mechanical stress stimulates plants to produce higher levels of lignin and cellulose, thickening and strengthening the main stem.
Indoors, air is completely stagnant. To prevent leggy seedlings from toppling over:
- Set up a small oscillating desk fan on low speed, blowing a gentle breeze across your seedling trays for two hours each day.
- Alternatively, brush your open hand gently across the tops of the seedlings several times whenever you inspect your trays. This tactile stimulation creates wonderfully thick, stocky, resilient stems.
Troubleshooting Common Seed Starting Problems
Even experienced growers occasionally encounter setbacks indoors. Keep this diagnostic checklist handy to solve problems quickly:
               ┌────────────────────────────────────────────────────────┐
               │ Seedling Health and Troubleshooting Checklist          │
               └───────────────────────────┬────────────────────────────┘
                                           │
                       What symptom is your seedling showing?
                                           │
       ┌───────────────────────────┬───────┴───────────────────────────┐
       ▼                           ▼                                   ▼
Tall, spindly, pale,        Seedling suddenly collapses         Purple tint on lower
leaning sideways toward     at soil level with water-soaked     leaf undersides with
distant window light?       pinched, thread-like stem?          slow, stalled growth?
       │                           │                                   │
LEGGY SEEDLINGS             DAMPING-OFF FUNGUS                  PHOSPHORUS LOCKOUT
(Insufficient light;        (Pythium/Rhizoctonia fungal spores; (Root zone is too cold;
lower grow light to 3       overwatering + cold stagnant soil;  water with mild organic
inches from plant canopy,   destroy tray, sanitize containers)  kelp tea, warm room up)
provide 16 hours daily)
1. Damping-Off Fungal Disease
- Symptoms: A healthy, upright green seedling suddenly falls over at the soil line overnight. The stem at the soil boundary appears water-soaked, shriveled, and pinched like a thread.
- Cause: Soil-borne pathogenic water molds (Pythium, Rhizoctonia, or Fusarium) that thrive in cool, overly saturated potting soil with high humidity and stagnant air.
- Prevention and Cure: Damping-off is incurable once it strikes an individual seedling. Immediately discard infected seedlings and surrounding soil to stop the spread. Prevent it by using sterilized soilless seed starting mix, bottom-watering, removing humidity domes the moment seeds sprout, and providing continuous gentle fan airflow.
2. Spindly, Leggy Stems
- Symptoms: Seedlings develop long, pale, thread-like stems that lean heavily sideways and cannot support their own cotyledons.
- Cause: Chronic lack of photosynthetic light intensity. The seedling is expending all its stored energy elongating stems toward a distant light source.
- Remedy: Windowsill light is virtually never sufficient in winter. Position full-spectrum LED grow lights directly above the plants, lowering the lamps to within three to four inches of the foliage. For leggy tomato seedlings, you can gently bury the elongated stem deeper into potting mix during transplanting; tomatoes naturally sprout new roots along their buried stems.
3. Stalled Growth and Yellowing Leaves
- Symptoms: Seedlings sprout vigorously, produce their first set of tiny seed leaves (cotyledons), and then completely stop growing, with leaves gradually turning pale lime-green or yellow.
- Cause: Nutrient starvation. Commercial seed starting mixes are deliberately formulated with zero fertilizer to prevent burning tender young seed embryos. Once the seedling exhausts the food stored in the seed endosperm (which happens after true leaves emerge), it requires external nutrients.
- Remedy: Begin feeding seedlings weekly with a gentle, half-strength organic fertilizer solution, such as liquid fish hydrolysate and kelp meal diluted in water.
Hardening Off: The Vital Bridge to the Outdoor Garden
Never move indoor seedlings directly from a climate-controlled kitchen into full outdoor garden sun. Indoor plants have grown under filtered glass and static temperatures; their leaf cuticles are thin, and they lack protective UV-absorbing pigments.
Placing indoor seedlings directly into bright sunlight and gusty wind causes severe sunscald, whitening leaves, desiccating tissues, and frequently killing plants within forty-eight hours.
The Seven-Day Hardening Off Schedule
Hardening off is the gradual acclimatization of indoor plants to outdoor wind, direct ultraviolet sunlight, and temperature swings. Begin this process seven to ten days before your target transplant date:
- Day 1: Place seedling trays outdoors in full, sheltered shade protected from strong winds for two hours during the warmest part of the afternoon. Bring them back indoors before evening.
- Day 2: Leave trays in sheltered shade for four hours.
- Day 3: Move trays into dappled shade with one hour of gentle morning sun.
- Day 4: Provide three hours of morning sun followed by afternoon shade. Monitor soil moisture closely; outdoor breezes dry potting cells rapidly.
- Day 5: Expose seedlings to five hours of direct outdoor sun.
- Day 6: Leave seedlings in full sun all day long. If nighttime temperatures remain safely above fifty degrees Fahrenheit for warm-season crops (or forty degrees for cool-season crops), leave the trays outdoors overnight.
- Day 7: Seedlings are now fully hardened off with thick, waxy leaf cuticles and sturdy stems, ready to be transplanted into your outdoor raised beds, containers, or garden plots.
Connecting Garden Harvests to Long-Term Preservation
The ultimate satisfaction of growing from seed is watching tiny specks of life transform into an overwhelming harvest that feeds your family throughout the entire year. Planning your seed starting around preservation goals ensures that every square foot of your garden yields high-value returns.
- When your seed-started pickling cucumbers produce baskets of fruit, explore authentic probiotic lacto-fermentation in our guide to Fermentation for Beginners: Equipment, Safety, and First Recipes.
- For heavy yields of bush green beans, sweet corn, and zucchini, eliminate freezer burn and store vegetables for three years by reading our comprehensive testing review on the Best Vacuum Sealers for Garden Harvest.
- If you are growing rows of heirloom paste tomatoes for rich shelf-stable pasta sauces, master the food science of acidity in Water Bath vs Pressure Canning and review the Best Pressure Canners for Home Canning.
- Return to our main Gardening Hub for seasonal crop checklists, and browse the Food Storage Hub to organize your home pantry.
Frequently Asked Questions About Seed Starting
When should I start my seeds indoors?
Look up the average last spring frost date for your specific geographic zip code. Most seed packets indicate sowing dates relative to that frost date (for example, start six to eight weeks before the last frost). In general, slow-growing warm-season crops like peppers and eggplants are started eight to ten weeks before last frost; tomatoes, brassicas, and basil are started six weeks before; fast-growing squashes and cucumbers are started only two to three weeks before last frost. Starting seeds too early indoors results in overgrown, root-bound plants that suffer severe transplant shock.
Can I use regular shop lights instead of expensive grow lights?
Yes, standard modern T5 or T8 LED shop lights with a daylight color temperature rating of 5000K to 6500K work wonderfully for growing vegetative seedlings. Specialized horticultural grow lights provide optimized red and blue wavebands, but high-lumen daylight LEDs provide all the photosynthetic energy necessary to grow stocky seedlings through the six-week indoor window.
Why do my seeds germinate unevenly?
Uneven germination is usually caused by inconsistent moisture or uneven soil temperature. If the edges of your tray dry out while the center remains wet, seeds on the perimeter will lag behind. Using a VIVOSUN heat mat provides uniform bottom warmth, while a clear humidity dome prevents moisture gradients across the tray.
How often should I water my seedlings?
Never water on a rigid calendar schedule. Instead, observe the color and weight of your cell trays. When the surface of the seed mix turns pale brown and the tray feels light when lifted, it is time to bottom-water. If the soil is dark brown, damp to the touch, and the tray feels heavy, do not add water. Overwatering kills far more seedlings than underwatering.
Should I reuse plastic seed trays every year?
Yes, but you must sanitize them thoroughly before each season. Fungal spores and bacterial pathogens can persist on dry plastic surfaces from previous crops. Soak used trays in a ten percent bleach solution (one part household bleach to nine parts clean water) for fifteen minutes, scrub with a brush, rinse thoroughly, and let air dry before filling with fresh potting mix.
Can I save seeds from store-bought grocery produce?
Generally no. Most grocery store vegetables are commercial F1 hybrids. Seeds saved from hybrid produce do not breed true to type; their offspring often produce wildly unpredictable, flavorless, or unproductive fruit. Additionally, grocery produce is often treated with sprout inhibitors. Always start with certified, open-pollinated or heirloom seeds purchased from reputable seed suppliers. To learn how to properly harvest, ferment, and store seeds from your homegrown heirloom crops, read our complete guide on how to save seeds from your garden.
What should I do if mold appears on the soil surface?
A fuzzy white mold growing across the top of seed starting soil is usually a harmless saprophytic fungus feeding on organic matter. However, it indicates that humidity is too high and air circulation is stagnant. Immediately remove the humidity dome, set up a gentle fan to increase airflow, let the top quarter-inch of soil dry out between waterings, and sprinkle a light dusting of ground cinnamon across the soil surface; cinnamon contains natural antifungal cinnamaldehyde compounds that suppress surface mold growth.
Final Verdict and Recommendation
Starting your garden indoors from seed transforms you from a casual consumer into a self-reliant producer, unlocking incredible heirloom flavors, resilience, and garden joy.
For most beginners, the Growfriend Seed Starter Kit with LED Grow Lights is the absolute premier choice. It integrates high-output full-spectrum lighting, precision humidity venting, clear root-inspection cells, and automated timer cycles into an affordable, modular desktop footprint that eliminates all traditional windowsill frustrations.
If you already own hanging shop lights or an indoor shelving rack, adding the VIVOSUN Waterproof Seedling Heat Mat is the single highest-impact upgrade you can make to your garden setup. By providing gentle bottom warmth, it accelerates stubborn pepper and tomato germination by weeks and protects your precious seeds from chilly indoor drafts.
Finally, for high-volume gardeners seeking an economical, mess-free system that guarantees zero transplant shock, the classic Jiffy 72-Cell Peat Pellet Greenhouse provides decades of proven reliability.
Equip your indoor potting space with the right tools, respect the soil temperature requirements, keep lights low and bright, and enjoy the magical anticipation of watching your summer harvest awaken under your care.