How to Save Seeds from Your Garden: The Beginner's Complete Guide
Discover how to save seeds from your backyard garden with our step-by-step beginner guide. Learn wet vs dry extraction, heirloom preservation, and airtight storage systems.
Disclosure: This post contains affiliate links. As an Amazon Associate, we earn from qualifying purchases at no extra cost to you. We only recommend products we believe are genuinely useful for home food preservation.
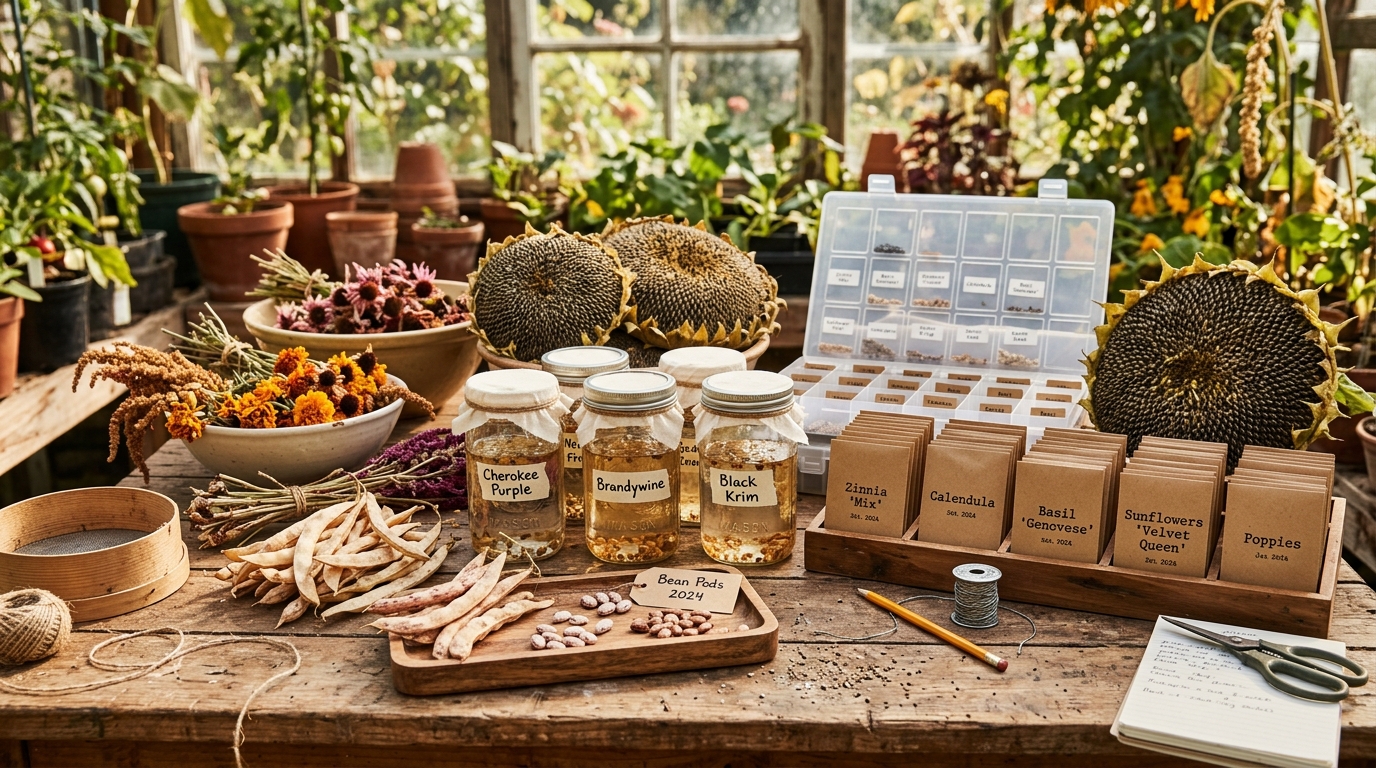
Every successful garden journey begins with a humble packet of seeds, yet millions of gardeners throw away a fortune every autumn by letting their healthiest plants wither without collecting the next generation.
When you learn how to save seeds from your own backyard, you step out of the endless cycle of purchasing commercial seed packets every spring. You take absolute control over your food sovereignty, protect rare heirloom genetics, and slowly breed custom vegetable varieties that are genetically acclimated to your specific soil, climate, and backyard microclimate.
Saving seeds connects the harvest season directly to the upcoming planting calendar. It transforms gardening from a seasonal hobby into an enduring, regenerative homestead cycle.
“Saving seeds is the ultimate act of agricultural self-reliance. When you collect, preserve, and replant your own heirloom seeds, you adapt crops to your local microclimate while cutting garden expenses permanently.”
Whether you want to harvest handfuls of dry bean pods, master the bubbling microbiology of tomato seed fermentation, or organize hundreds of delicate flower varieties into an organized home seed bank, this comprehensive beginner guide covers every step.
We examine the genetics behind seed viability, demonstrate dry and wet processing methods, provide the golden rules of moisture control, review essential storage equipment, and walk through germination testing so you never waste time planting dead seeds.
The Compelling Benefits of Saving Homegrown Seeds
Before diving into the mechanical steps of collecting and processing seeds, it helps to understand why experienced homesteaders and backyard growers dedicate time to this practice every year.
1. Superior Plant Acclimatization and Resilience
Commercial seed companies grow their crops in massive monoculture fields, frequently located in arid valleys or controlled industrial greenhouses. When you purchase those seeds, the parent plants were selected for uniform machine harvesting rather than your local rainfall patterns or summer humidity levels.
By saving seeds year after year from the most vigorous, disease-resistant plants in your specific garden beds, you perform micro-selection. Over four to five generations, your homegrown tomatoes, peppers, and beans adapt to your region, developing higher drought tolerance, pest resistance, and vigor than generic retail seed stock.
2. Preserving Rare Heirloom Flavors and Genetic Diversity
Industrial agriculture prioritizes produce with thick skins that survive long-haul refrigerated trucking. Unfortunately, flavor and nutritional complexity are almost always sacrificed in commercial breeding programs.
Heirloom varieties, passed down through generations for their exceptional sweetness, deep earthiness, and vibrant colors, survive solely because home gardeners save their seeds. By preserving heirloom cultivars like Cherokee Purple tomatoes or Kentucky Wonder beans, you preserve cultural history and guard against the dangerous genetic bottlenecks of commercial agribusiness.
3. Substantial Financial Savings and Abundance
A single commercial seed packet containing twenty to thirty seeds often costs four to six dollars. A single healthy heirloom Brandywine tomato plant, by contrast, can easily produce fifty to one hundred tomatoes throughout the summer. Each tomato contains upwards of one hundred seeds.
From just one plant, you can collect thousands of high-viability seeds. This immense abundance allows you to sow densely, share freely with neighbors, trade at community seed swaps, and build an emergency food security reserve without spending a dime.
If you are pairing your seed saving efforts with indoor propagation under lights, review our hands-on evaluation of the Best Seed Starting Kits Guide to get your saved seeds off to a strong start.
Crucial Plant Genetics: Heirlooms, Hybrids, and Open-Pollinated
To save seeds successfully, you must understand three foundational horticultural terms. Attempting to collect seeds from the wrong types of retail vegetables is the single most common cause of disappointment for beginner gardeners.
+-----------------------------------------------------------------------------------+
|                            PLANT REPRODUCTIVE TYPES                               |
+-----------------------------------------------------------------------------------+
|  1. Open-Pollinated (OP)                                                          |
|     * Pollinated by wind, insects, or selfing without human intervention.         |
|     * Produces offspring identical to parents when isolated from other varieties. |
|     * BEST FOR SEED SAVING: Seeds breed true to type every generation.            |
+-----------------------------------------------------------------------------------+
|  2. Heirloom Varieties                                                            |
|     * A historical subclass of open-pollinated plants (usually 50+ years old).    |
|     * Carefully maintained through generations for prized traits and flavor.      |
|     * BEST FOR SEED SAVING: Stable traits, exceptional culinary qualities.       |
+-----------------------------------------------------------------------------------+
|  3. Hybrid (F1) Plants                                                            |
|     * Deliberate cross between two distinct inbred parent lines.                  |
|     * Exhibiting "hybrid vigor" for uniform commercial yield.                    |
|     * DO NOT SAVE: Second-generation (F2) seeds revert randomly to parent traits. |
+-----------------------------------------------------------------------------------+
Open-Pollinated Varieties (OP)
Open-pollinated plants reproduce through natural mechanisms such as wind, pollinating insects, or self-pollination. The defining characteristic of open-pollinated varieties is that they breed true to type.
When you collect seeds from an open-pollinated plant that was kept isolated from other varieties of the same species, the resulting offspring will display the exact same growth habits, leaf structures, fruit flavors, and colors as the parent plant. All serious seed saving focuses on open-pollinated plants.
Heirloom Cultivars
Heirlooms are open-pollinated varieties that possess a documented history of preservation, typically preserved within families, communities, or indigenous groups for at least fifty years.
Many heirloom varieties have survived since the nineteenth century or earlier. Every heirloom is open-pollinated, which means you can save its seeds with complete confidence that future crops will retain the legendary qualities that made the variety famous.
F1 Hybrids (First Generation Crosses)
Hybrid seeds, frequently marked with the abbreviation F1 on retail packets, are created by plant breeders who manually cross two distinctly inbred parent strains to capture specific traits like uniform ripening or disease resistance.
While F1 hybrid crops perform reliably during their initial season, you cannot save their seeds with predictable results.
The seeds collected from an F1 hybrid plant will fracture genetically according to classical Mendelian inheritance laws. When you plant those second-generation seeds, you may get weak plants, bitter fruit, irregular yields, or plants that look completely different from the fruit you harvested.
Unless you are conducting experimental plant breeding for personal curiosity, avoid saving seeds from hybrid cultivars.
Preventing Cross-Pollination in the Backyard Garden
Even when growing open-pollinated or heirloom crops, cross-pollination between different varieties within the same plant species can ruin your seed purity.
If you plant a hot jalapeño pepper adjacent to a sweet bell pepper, the current season fruits will taste normal. However, if a bumblebee transfers pollen between the two blossoms, the seeds inside that bell pepper will contain hybrid genetics. When you plant those seeds the following spring, you might harvest small, unpredictable peppers with spicy heat and thin walls.
Self-Pollinating vs Cross-Pollinating Species
Understanding which crops cross-pollinate easily allows you to plan your garden beds strategically:
| Crop Category | Primary Pollination Mechanism | Cross-Pollination Risk | Recommended Isolation Distance |
|---|---|---|---|
| Beans and Peas | Self-pollinating (pollinates before blossom opens) | Very Low | 10 to 20 feet |
| Tomatoes | Self-pollinating (modern cultivars with enclosed stigmas) | Low | 10 to 50 feet |
| Lettuce | Self-pollinating | Very Low | 10 to 15 feet |
| Peppers | Self-pollinating, but bees love flower nectaries | Moderate to High | 100 to 500 feet (or blossom bags) |
| Cucumbers and Melons | Insect-pollinated (separate male and female blossoms) | Very High | 500 to 1,300 feet (or hand-pollination) |
| Squash and Pumpkins | Insect-pollinated (separate male and female blossoms) | Extreme | Half mile (or tape blossoms shut) |
| Corn | Wind-pollinated | Extreme | 1,000 feet to 2 miles |
Practical Backyard Isolation Techniques
Most backyard gardeners do not possess five acres of land to isolate squash or pepper varieties by half a mile. Fortunately, simple physical barriers deliver complete seed purity in compact yards.
1. Organza Blossom Bags
For peppers, tomatoes, and self-fertile flowers, slip a small breathable mesh organza bag over an unopened flower cluster. Secure the drawstring snugly around the stem.
The bag allows air and sunshine to enter while preventing bees from depositing foreign pollen. Gently shake the bag once a day to distribute pollen internally. Once petals drop and a miniature green fruit appears, remove the bag and tie a colored ribbon around the stem so you remember to harvest seeds from that specific fruit.
2. Hand-Pollinating Squash Blossoms
Squash and pumpkins produce large, easily visible male and female blossoms. The evening before blooms open, locate a mature male bud and a female bud (identifiable by the miniature fruit at its base).
Use a strip of painter tape to gently tape the tips of both blossoms closed so nighttime moths cannot enter.
The next morning, untape both flowers, pluck the male blossom, carefully peel back its yellow petals to expose the pollen-dusted anther, and dab the pollen generously onto the center stigma of the female flower. Tape the female flower shut once more. Tie a bright string to the fruit stem to identify it at harvest time.
The Two Fundamental Extraction Methods: Dry vs Wet
Garden seeds divide naturally into two broad physiological categories, each requiring a completely distinct harvesting and processing technique:
+------------------------------------------------------------------------------------+
|                         SEED EXTRACTION METHODOLOGY                                |
+------------------------------------------------------------------------------------+
|  A. DRY SEED CROPS                                                                 |
|     * Seeds mature inside dry pods, seed heads, or husks on the plant.             |
|     * Examples: Beans, peas, lettuce, radishes, brassicas, onions, corn, herbs.    |
|     * Process: Allow pods to turn brown and crisp on the vine, shell, winnow chaff. |
+------------------------------------------------------------------------------------+
|  B. WET SEED CROPS                                                                 |
|     * Seeds develop suspended inside moist, fleshy pulp or fruit cavity.           |
|     * Examples: Tomatoes, cucumbers, melons, squash, pumpkins, peppers.            |
|     * Process: Extract pulp, ferment with water to dissolve gelatinous coat, rinse. |
+------------------------------------------------------------------------------------+
Let us examine each extraction protocol in complete practical detail.
Masterclass: Harvesting Dry Seed Crops
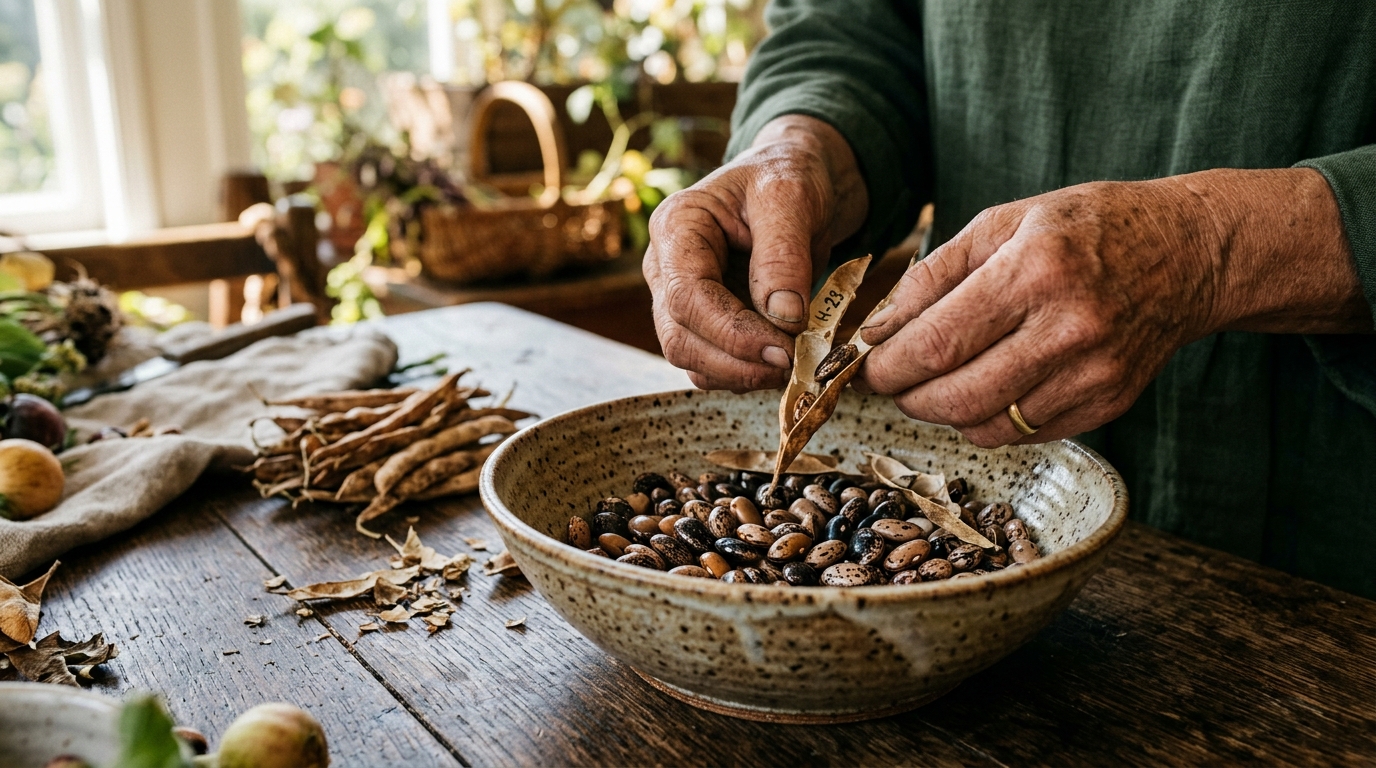
Dry seed crops are the easiest starting point for novice seed savers because they do not require fermentation or elaborate water washing.
1. Beans and Peas (Legumes)
Legumes are the gold standard for beginning seed savers. Their flowers are self-pollinating and rarely cross, and their large seeds are simple to handle.
- Selection: Mark your three healthiest, most productive bean plants early in the summer. Do not pick tender green pods from these marked plants for kitchen dinners; allow them to direct all their energy into mature seeds.
- Harvest Timing: Leave the pods on the vine until the entire plant dries out, turns yellow-brown, and the leaves drop. The pods should rattle when shaken and feel brittle like paper.
- Extraction: In late autumn on a sunny afternoon, snap the pods from the vine. Crack open each pod by hand over a clean bowl. Pop the shiny beans out into the dish and discard the fibrous hulls.
- The Fingernail Dent Test: To verify that beans are sufficiently dry for long-term storage, press your thumbnail firmly into the side of a bean. If your nail leaves a visible dent, the seed still contains too much internal moisture and will mold in storage. Continue drying them on a screen in a warm, ventilated room until your nail cannot leave any impression.
2. Lettuce, Brassicas, and Radishes
Vegetables in these families develop branching seed stalks when temperatures rise in summer, a process known as bolting.
- Managing Bolting: While bolted lettuce tastes bitter and unpalatable for salads, it produces clusters of yellow flowers that transform into miniature downy seed heads resembling dandelions.
- Harvesting with Paper Bags: As soon as roughly half of the seed heads display fluffy white tufts, cut the entire seed stalk near ground level. Invert the stalk into a large brown paper grocery bag and secure the opening around the stems with twine.
- Threshing and Winnowing: Hang the bag upside down in an airy shed or garage for two weeks. As the pods finish drying, they split open naturally, dropping clean seeds into the bottom of the bag. Shake the bag vigorously to dislodge remaining seeds.
To remove light, papery chaff from dense seeds, pour the mixture slowly from one bowl to another in front of a gentle electric fan on a low setting. The breeze blows away light dust while heavy seeds drop straight down into the collection bowl.
3. Herbs and Ornamental Flowers
Coriander (cilantro), dill, fennel, basil, sunflowers, and marigolds are harvested similarly. Wait until flower umbels or seed discs turn crisp and brown under direct sunshine.
Clip flower heads on a dry morning after dew evaporates, shake them over a fine mesh wire strainer to separate seeds from stems, and set them out on ceramic plates for secondary drying.
Masterclass: Harvesting Wet Seed Crops and Fermentation
Wet seed crops require an extra biological step. Seeds that develop inside moist fruits, particularly tomatoes and cucumbers, are coated in a slippery gelatinous sheath containing natural biochemical germination inhibitors.
In nature, this gel prevents the seeds from sprouting inside the warm, moist belly of the tomato while it hangs on the vine.
In commercial and home seed saving, we simulate the natural rotting process through a controlled short fermentation. Fermentation digests the gelatinous coat, kills seed-borne bacterial and fungal pathogens such as bacterial canker, and separates viable seeds from empty duds.
+------------------------------------------------------------------------------------+
|                         TOMATO SEED FERMENTATION STEPS                             |
+------------------------------------------------------------------------------------+
|  1. Squeeze pulp and seeds into a clean glass jar (add 2 tablespoons water).       |
|  2. Cover with cheesecloth or coffee filter; secure with a rubber band.            |
|  3. Ferment at 70°F to 80°F for 3 to 4 days until white mold foam forms on top.    |
|  4. Add water, swirl, let settle: viable seeds sink, hollow seeds and mold float.  |
|  5. Pour off top scum; rinse sunken seeds thoroughly through a fine mesh strainer. |
|  6. Spread seeds in a single layer on parchment paper or ceramic plate to dry.     |
+------------------------------------------------------------------------------------+
Step-by-Step Tomato Seed Fermentation
- Pick Fully Ripe Fruit: Select prime tomatoes that are fully colored and slightly soft. Overripe fruit is fine, but avoid fruit exhibiting rotting blemishes or fungal decay.
- Extract Pulp: Slice the tomato along its equator. Squeeze the seeds and surrounding jelly into a clean glass jar, such as a wide-mouth pint canning jar. If you are fermenting small cherry tomatoes, add two tablespoons of non-chlorinated water to ensure adequate liquid volume.
- Cover and Label: Cover the jar mouth with a paper coffee filter or breathable cotton cloth secured with a rubber band. This allows gases to escape while keeping fruit flies away. Write the tomato cultivar name and date on the jar.
- The Fermentation Period: Place the jar in a warm, out-of-the-way spot, such as the top of a refrigerator, maintaining a temperature between 70°F and 80°F (21°C to 27°C). Swirl the jar once daily. Over three to four days, naturally occurring yeasts and bacteria feast on the sugars in the gel. A pale, leathery mold layer will form on the liquid surface, accompanied by a sour, fermenting cider aroma.
- Decanting and Cleaning: As soon as the mold film covers the surface, do not let it sit any longer, or warm seeds may begin sprouting. Pour warm water into the jar and stir vigorously with a spoon. Allow the mixture to settle for sixty seconds.
Notice what happens: plump, viable seeds sink straight to the bottom of the glass jar, while immature seeds, pulp debris, and mold float to the surface. 6. Pour Off Scum: Slowly pour off the top liquid, mold, and floating dud seeds. Add more clean water, swirl, and pour off the top liquid again. Repeat this decanting three to four times until only sparkling clean seeds remain at the bottom of the jar in crystal-clear water. 7. Strain and Dry: Dump the clean seeds into a fine mesh stainless steel kitchen strainer. Tap the strainer against a towel to remove excess water. Spread the seeds out onto a flat ceramic plate, glass pie pan, or sheet of parchment paper.
Never dry seeds on standard paper towels or napkins, because the wet gelatinous matrix will bond to paper fibers like industrial glue, making the seeds impossible to separate without tearing.
For more details on household fermentation science, explore our comprehensive primer on Fermentation for Beginners.
Harvesting Peppers and Squash (Non-Fermented Wet Crops)
Peppers and winter squash do not possess strong gelatinous germination inhibitors and do not require water fermentation.
- Peppers: Allow peppers to ripen past their edible culinary stage until they reach their final mature color (red, orange, or deep yellow) and begin wrinkling slightly. Slice around the stem, pry open the seed placenta, and scrape seeds onto a paper plate using a butter knife. Wear nitrile gloves when handling hot chili seeds to protect your hands and eyes from painful capsaicin oils.
- Winter Squash and Pumpkins: Harvest mature squash before hard ground freezes. Cut the squash open, scoop out the fibrous seed cavity into a bowl of warm water, and massage the seeds with your fingers to release stringy flesh. Viable seeds sink, while hollow seeds float. Rinse clean seeds and spread on drying screens.
The Critical Drying Phase: Moisture Science and the Rule of 100
Moisture is the number one enemy of saved seeds. Storing seeds that contain even two percent excess internal moisture leads to rapid fungal rot, internal cellular death, or premature sprouting inside storage bags.
+------------------------------------------------------------------------------------+
|                         THE CRITICAL SEED EQUATION                                 |
+------------------------------------------------------------------------------------+
|                                                                                    |
|       Storage Temperature (°F)  +  Relative Humidity (%)  <  100                   |
|                                                                                    |
|   Example 1: 65°F closet + 30% relative humidity = 95   ->   [SAFE FOR STORAGE]     |
|   Example 2: 75°F garage + 60% relative humidity = 135  ->   [SEEDS WILL DIE]       |
+------------------------------------------------------------------------------------+
Harrington’s Rule of 100
Agricultural agronomist Dr. James Harrington formulated a famous benchmark that professional seed banks adhere to worldwide:
The sum of the storage temperature in degrees Fahrenheit plus the relative humidity percentage should always remain under 100.
If your storage room is kept at 65°F, your ambient storage humidity must be kept below 35% to prevent cellular degradation.
Furthermore, for every 1% reduction in seed internal moisture (between 5% and 14%), the storage life of that seed doubles. Conversely, for every 10°F drop in storage temperature, the seed longevity doubles again.
How to Dry Seeds Safely
- Air Circulation: Place seeds in a single layer on ceramic plates or framed fiberglass window screens in a room with continuous airflow. A small oscillating electric fan on low speed accelerates moisture evaporation without disturbing seeds.
- Never Apply Artificial Heat: Never dry garden seeds inside a food dehydrator, microwave, or warm oven. Temperatures exceeding 95°F (35°C) damage internal seed embryos and destroy germination viability permanently.
- Target Drying Time: Depending on room humidity and seed thickness, thorough air drying requires seven to fourteen days.
Essential Equipment for Serious Seed Savers: 2026 Reviews
While you can start saving seeds with recycled jam jars and scrap envelopes, building a durable, pest-proof, moisture-controlled seed bank requires dedicated storage gear.
Below are three verified, highly rated tools available on Amazon that eliminate humidity risks, keep hundreds of seed cultivars categorized, and protect your precious genetics from pantry pests.
IRIS USA 4" x 6" Photo and Craft Keeper with 16 Inner Cases
Best for: Categorizing hundreds of seed varieties into individual moisture-resistant cases
- 16 individual snap-tight 4x6 cases hold hundreds of seed packets
- Large outer carrying case with comfortable molded handle
- Clear BPA-free plastic allows instant seed visibility
- Stackable design keeps seeds safe from crushing and dust
- Takes up more shelf space than flat binder sleeves
The centerpiece of any organized home seed bank is a modular, compartmentalized container system. Cardboard shoe boxes and paper envelopes stacked in drawers inevitably lead to crushed packets, lost varieties, and easy access for hungry mice or pantry moths.
The IRIS USA Photo and Craft Keeper is celebrated across the home gardening community as the single best seed storage solution on the market.
Constructed from heavy-duty, BPA-free clear polypropylene, this system features a large master carrying box with a molded handle that houses sixteen individual snap-tight four-by-six-inch internal cases.
Each internal case holds up to twenty-five standard seed packets or dozens of self-sealing kraft envelopes. You can organize one case for heirloom tomatoes, one for brassicas, one for root vegetables, and another for pollinator flowers.
The individual latching lids protect varieties from ambient humidity every time you open the main case, preventing condensation from spoiling your entire collection.
Sabary 100-Pack Self-Sealing Kraft Seed Saving Envelopes
Best for: Harvesting, labeling, and organizing homegrown garden seeds
- Durable thick brown kraft paper blocks light degradation
- Self-sealing peel-and-stick adhesive strip eliminates glue mess
- Pre-printed template for variety, collection date, and notes
- Pack of 100 envelopes provides multi-season supply
- Paper material requires an outer airtight container in humid climates
Once you harvest, thresh, and dry your homegrown seeds, you need reliable, light-blocking packaging to preserve their viability. Storing seeds in clear zip-top plastic sandwich bags exposes delicate plant embryos to ambient UV light, which degrades seed hormones over time.
The Sabary 100-Pack Self-Sealing Kraft Seed Saving Envelopes provide the ideal storage medium.
Manufactured from thick, opaque brown kraft paper, these envelopes block out light completely while allowing microscopic moisture vapor to breathe during final equilibrium.
Each envelope features pre-printed exterior lines specifically designed for gardeners, allowing you to clearly record the crop name, specific variety, harvest date, and custom planting notes.
The peel-and-stick adhesive flap seals tightly without requiring messy tape or licking dry glue, creating an impenetrable envelope that prevents tiny carrot or brassica seeds from leaking into your storage bins.
Dry & Dry 5 Gram Food Safe Silica Gel Desiccant Packets (50-Pack)
Best for: Preventing mold and maintaining optimal low humidity inside seed vaults
- Food safe US FDA compliant silica gel beads
- Reactivable and reusable by gently warming in an oven
- Heavy-duty coated paper packets prevent bead leakage
- Prevents premature germination and fungal decay during long storage
- Must be monitored and reactivated periodically in high humidity
The secret weapon of master seed savers and international seed vaults is active desiccant moisture control. Even when seeds feel dry to the touch, humid summer air trapped inside storage containers can slowly elevate moisture levels, fostering fungal spores.
The Dry & Dry 5 Gram Food Safe Silica Gel Desiccant Packets eliminate this hazard completely.
These premium packets contain pure white, food-grade amorphous silica gel beads enclosed in tear-resistant, breathable coated paper. Placing two or three packets inside each airtight seed storage container draws residual humidity out of the air, locking internal container humidity below twenty-five percent.
Best of all, these packets are infinitely reusable: if the beads absorb moisture after several seasons, you simply place the packets on a baking sheet in a warm oven at 200°F for ninety minutes to reactivate them to pristine absorption capacity.
Equipment Comparison Matrix for Seed Preservation
To assist your workshop planning, the following table compares key specifications for organizing and protecting your seed reserves:
| Product | Primary Purpose | Material / Construction | Capacity / Quantity | Key Advantage |
|---|---|---|---|---|
| IRIS USA 16-Case Keeper | Master Organization & Protection | Heavy-duty BPA-free plastic | 16 individual 4x6 cases (300+ packets) | Pest-proof, stackable, moisture-resistant |
| Sabary Kraft Envelopes | Packaging & Labeling | Opaque brown kraft paper | 100 self-adhesive envelopes | UV-blocking, pre-printed catalog lines |
| Dry & Dry Silica Gel Packets | Humidity & Mold Prevention | Food-grade FDA-compliant silica | 50 five-gram packets | Reusable, prevents dampness & mold rot |
For secondary storage of bulk grain or bean harvests, you can also pair these tools with airtight kitchen canisters; see our review of the Best Reusable Food Storage Containers for durable pantry options.
Seed Longevity Guide: How Many Years Do Seeds Last?
Not all seeds possess the same internal lifespan. Some species retain high viability for nearly a decade, while others lose vigor within twelve to twenty-four months, even under optimal storage conditions.
+------------------------------------------------------------------------------------+
|                         EXPECTED SEED LONGEVITY TIMELINE                           |
|                    (Stored Cool, Dark, and Dry at < 40% Humidity)                  |
+------------------------------------------------------------------------------------+
|  1 to 2 Years: Short-Lived Seeds                                                   |
|  * Onions, leeks, parsnips, sweet corn, spinach.                                   |
|  * ACTION: Save fresh seed every year or every two years maximum.                  |
+------------------------------------------------------------------------------------+
|  3 Years: Medium Longevity Seeds                                                   |
|  * Beans, peas, carrots, peppers, lettuce.                                         |
|  * ACTION: Highly dependable for multi-season rotation.                            |
+------------------------------------------------------------------------------------+
|  4 to 5+ Years: Long-Lived Champions                                               |
|  * Tomatoes, radishes, cucumbers, melons, squash, brassicas (cabbage, kale).       |
|  * ACTION: Build substantial reserves; seeds remain vigorous for half a decade.    |
+------------------------------------------------------------------------------------+
Detailed Longevity Chart by Crop Family
- Alliums (Onions, Shallots, Leeks): 1 year. Allium seeds contain thin seed coats and volatile oils that degrade rapidly. Always sow allium seeds fresh each season.
- Parsnips: 1 year. Germination rates drop precipitously after twelve months.
- Sweet Corn: 1 to 2 years. High sugar content in sweet corn varieties accelerates embryo decline compared to flint corn.
- Beans and Peas: 3 years. When kept dry and cool, legumes remain viable for three to four seasons without noticeable drop in vigor.
- Peppers and Eggplants: 2 to 3 years.
- Carrots and Celery: 3 years.
- Tomatoes: 4 to 10 years. Clean, fermented tomato seeds are famous for incredible longevity. When stored in an airtight container with silica gel in a cool pantry, fermented tomato seeds frequently germinate at ninety percent even after seven years.
- Cucurbits (Cucumbers, Squash, Melons, Watermelons): 5 to 6 years. Hard outer shells protect internal embryos from environmental fluctuations.
- Brassicas (Broccoli, Kale, Cabbage, Radish): 4 to 5 years. Small, spherical brassica seeds store exceptionally well.
How to Conduct a Germination Test (The Paper Towel Method)
Before dedicating valuable garden space, seed starting trays, and premium potting mix to older saved seeds, perform a simple germination test to evaluate seed viability.
+------------------------------------------------------------------------------------+
|                         THE PAPER TOWEL GERMINATION TEST                           |
+------------------------------------------------------------------------------------+
|  1. Dampen a strong paper towel with clean, room-temperature water.                |
|  2. Count out exactly 10 seeds and place them in a straight line along one half.   |
|  3. Fold the towel over the seeds and slide it into an unsealed ziplock bag.       |
|  4. Place in a warm location (70°F to 75°F) for 5 to 10 days.                      |
|  5. Count sprouted seeds to determine germination percentage:                      |
|     * 9 out of 10 sprouted = 90% viability (sow normally)                          |
|     * 6 out of 10 sprouted = 60% viability (sow twice as thickly)                  |
|     * Less than 4 sprouted  = < 40% viability (discard or compost)                 |
+------------------------------------------------------------------------------------+
Interpreting Your Test Results
- 80% to 100% Germination: Exceptional vigor. Sow your seeds according to standard spacing recommendations.
- 50% to 70% Germination: Moderate vigor. The seed lot is aging. You can still use these seeds successfully, but sow twice as many seeds per cell or furrow to compensate for lower viability, thinning out excess seedlings later.
- Below 40% Germination: Weak vigor. Seed embryos have deteriorated. Even seeds that manage to sprout will likely produce stunted, slow-growing plants with poor root architecture. Compost this seed lot and replace it with fresh stock.
Comprehensive Seed Saving Calendar: Four Seasons of Garden Planning
Successful seed preservation is an ongoing discipline woven into the entire gardening year. Use this seasonal roadmap to stay ahead of tasks:
Spring: Garden Layout and Crop Isolation
- Map Your Beds: Review plant varieties before planting. Ensure you are sowing open-pollinated or heirloom cultivars rather than F1 hybrids.
- Plan Isolation: Separate cross-pollinating species by adequate distances, or order organza isolation bags and plant markers.
- Tag Seed Mother Plants: Set aside dedicated plants in each garden bed that will be preserved exclusively for seed production, ensuring they receive optimal compost, mulch, and watering.
Summer: Blossom Protection and Roguing
- Blossom Bagging: Slip isolation bags over pepper and tomato flower clusters before petals open. Hand-pollinate winter squash blooms early in the morning.
- Roguing Inferior Plants: Roguing is the deliberate removal of off-type, diseased, or stunted plants from your garden. If a tomato plant develops early blight or produces deformed fruit, pull it out immediately. Never save seeds from weak plants, or you will pass those vulnerabilities down to future generations.
Autumn: Harvesting, Fermentation, and Curing
- Dry Crop Harvest: Collect dry bean and pea pods on crisp, sunny afternoons. Cut bolted lettuce and herb flower heads into paper bags.
- Wet Crop Fermentation: Process ripe heirloom tomatoes and cucumbers through a three-day water fermentation cycle. Wash and strain sunken viable seeds.
- The Curing Screen: Spread all harvested seeds across ceramic dishes, wooden trays, or window screens in an airy, dry room away from direct sunlight for two weeks.
Winter: Cataloging, Organizing, and Viability Testing
- Enveloping and Labeling: Decant cured seeds into Sabary seed envelopes. Record crop names, cultivars, harvest month, and specific notes.
- Organize Your Vault: Sort envelopes into the IRIS USA 16-case organizer according to plant family or planting schedule.
- Desiccant Placement: Drop fresh Dry & Dry silica gel packets into each storage case to maintain low humidity throughout winter.
- Conduct Germination Audits: Perform paper towel tests on older seed packets so you know exactly which varieties need refreshing in the upcoming spring.
For homestead pantry organization principles that complement your seed bank storage, consult our foundational tutorial on Freezer, Pantry and Shelf-Stable Basics.
Frequently Asked Questions About Saving Seeds
Can I save seeds from grocery store produce?
Generally, no. Most fresh vegetables found in commercial supermarkets (such as bell peppers, round red slicing tomatoes, and seedless cucumbers) are F1 hybrids bred for shelf life rather than home garden vigor.
Furthermore, much commercial supermarket produce is grown in overseas greenhouses where pollen sources are unknown, or harvested immature before seeds reach full physiological viability.
Always start your seed saving journey using certified open-pollinated or heirloom seed stock obtained from reputable seed houses or fellow home gardeners.
Will saving seeds cause inbreeding depression?
In self-pollinating crops like beans, peas, lettuce, and tomatoes, inbreeding depression is virtually non-existent. You can save seeds from a small number of plants for decades without any loss of vigor.
However, cross-pollinating species (especially corn, brassicas, and carrots) require a broader genetic base.
To maintain genetic health in corn, for example, you should save seeds from at least one hundred distinct plants. For home gardens with limited space, stick primarily to self-pollinating crops for effortless long-term genetic vigor.
Can I store seeds in the freezer?
Yes, freezing is an outstanding method for multi-decade seed preservation, provided the seeds are completely dry.
If seeds contain more than eight percent internal moisture when placed in a sub-zero freezer, the water inside cellular vacuoles expands into ice crystals, rupturing cell walls and killing the embryo instantly.
Before freezing seeds, dry them thoroughly for several weeks, seal them in a truly airtight container like a mason jar or heat-sealed mylar bag along with active silica gel desiccant, and let the sealed container come to room temperature for twelve hours before opening so condensation does not settle on cold seeds.
Why did my saved squash seeds produce weird, bitter fruit?
Squash, pumpkins, gourds, and zucchini belong to the species Cucurbita pepo, Cucurbita moschata, and Cucurbita maxima.
Varieties within the same species cross-pollinate with extreme ease across hundreds of yards via bees. If you grew a yellow crookneck squash near an ornamental gourd or acorn squash without isolating the blossoms, the resulting seeds represent a random hybrid cross.
In some cases, wild gourd crosses produce fruit containing high levels of cucurbitacins, natural bitter chemical compounds that can cause stomach upset. Always hand-pollinate and tape squash flowers if you intend to save their seeds.
Do I need to peel off the papery husk on bean seeds?
No. Once you split open the outer garden bean pod, the shiny seed inside is ready for curing. The seed coat itself is an integral part of the bean anatomy and protects the delicate cotyledons and embryo inside. Never attempt to peel the skin from beans, peas, or corn.
How do I know if my tomato seeds are done fermenting?
Your tomato fermentation is finished when a pale, wrinkled layer of white mold covers the surface of the liquid and viable seeds drop cleanly to the bottom of the glass jar when swirled.
This process typically takes between three to four days at room temperature. If you allow the fermentation to proceed for a week or longer, the seeds will absorb moisture, break dormancy, and begin growing tiny white root radicals in the jar, which ruins their viability.
Final Verdict and Your Path to Seed Independence
Learning how to save seeds is one of the most empowering skills any backyard gardener or modern homesteader can cultivate. It bridges the gap between passive consumerism and genuine agricultural mastery.
By understanding the vital distinction between open-pollinated heirlooms and commercial hybrids, isolating flower blossoms to preserve purity, mastering both dry pod threshing and tomato wet fermentation, and respecting Harrington’s Rule of 100 with active desiccant moisture control, you guarantee a lifetime of bountiful harvests.
Equip your garden workshop with dependable, purpose-built gear:
- Keep your collection categorized, safe from crushing, and organized with the IRIS USA 16-Case Craft and Seed Keeper.
- Package and document every variety clearly using Sabary Self-Sealing Kraft Seed Envelopes.
- Shield your seed vaults from moisture decay, mold, and premature sprouting with Dry & Dry Food Safe Silica Gel Desiccant Packets.
Step out into your garden this week, identify your most vibrant, delicious heirloom plants, let a few prize fruits mature to harvest ripeness, and begin your journey toward permanent seed independence.
Explore Related Guides in Our Network
- Master seed germination and propagation equipment: Best Seed Starting Kits Guide
- Preserve bulk harvests with airtight vacuum sealing: Best Vacuum Sealers for Home Food Preservation
- Discover lacto-fermentation science for vegetables: Fermentation for Beginners
- Organize your pantry and long-term pantry supplies: Best Reusable Food Storage Containers
- Return to the Backyard Gardening Hub or explore the Food Preservation Hub