Raised Bed Gardening on a Budget: How to Build, Fill, and Maximize High-Yield Beds
Build and fill productive raised garden beds without overspending. Discover durable galvanized steel beds, budget Hugelkultur filling methods, soil mixes, and weed prevention.
Disclosure: This post contains affiliate links. As an Amazon Associate, we earn from qualifying purchases at no extra cost to you. We only recommend products we believe are genuinely useful for home food preservation.
For millions of aspiring vegetable growers, the dream of stepping out into a lush backyard garden often collides with frustrating underground realities. Native backyard soil is frequently compacted builder fill, heavy suffocating clay that drains like concrete, or rocky ground overrun with stubborn perennial crabgrass.
Raised bed gardening offers the ultimate horticultural antidote. By elevating your growing zone above native ground level, you create an optimized root environment that warms weeks earlier in spring, never suffers from foot traffic compaction, and yields up to three times more produce per square foot than traditional in-ground rows.
However, many beginner gardeners suffer severe sticker shock when planning their first raised bed project. Retail lumber prices for cedar and redwood have skyrocketed, and filling a large wooden frame with retail bags of potting soil can easily cost hundreds of dollars per bed.
Fortunately, you do not need a massive construction budget to establish an abundant, beautiful raised bed homestead.
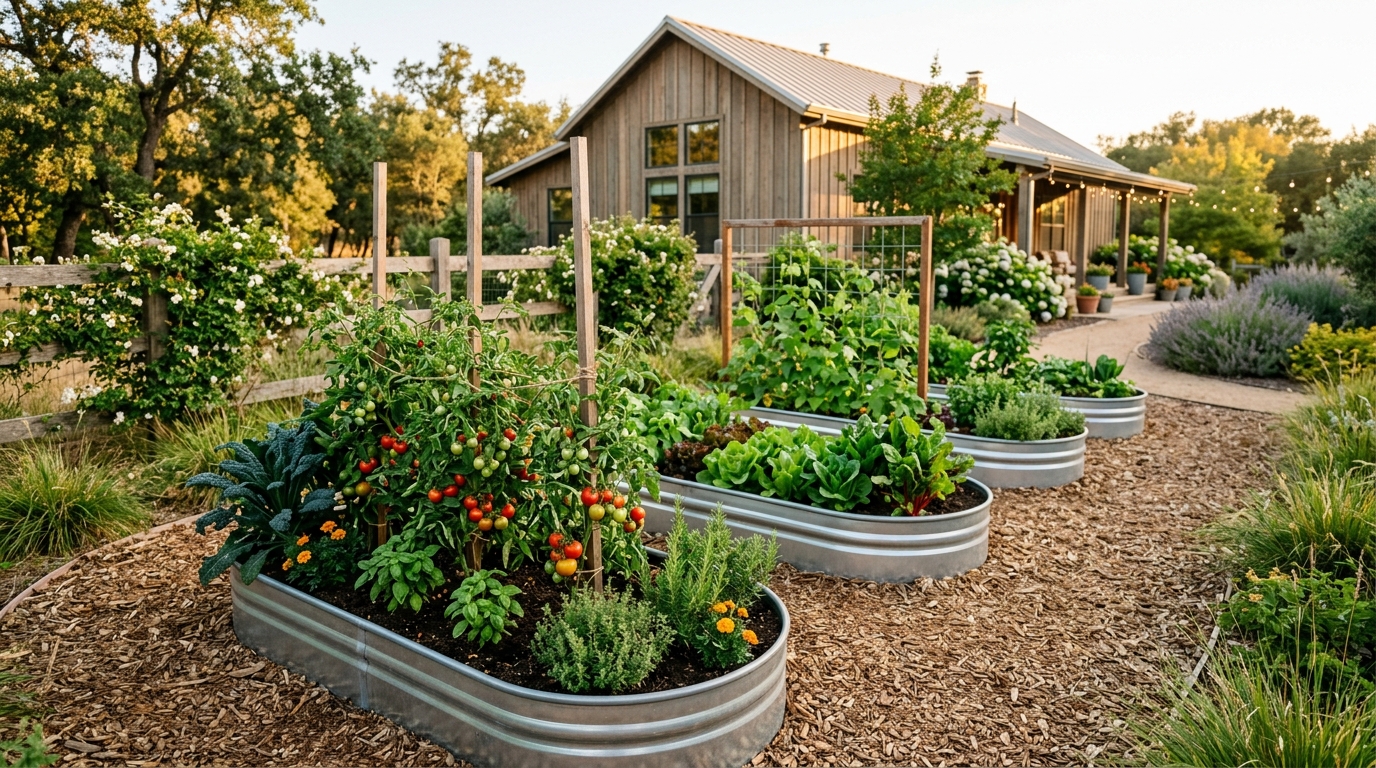
By combining modern galvanized metal bed kits with ancient permaculture layered filling techniques, you can build productive, pest-resistant garden beds that last for decades at a fraction of the cost of traditional timber framing.
“Raised bed gardening should liberate you from heavy clay and weeds without emptying your savings account. By combining long-lasting galvanized steel with natural Hugelkultur filling layers, you create fertile soil that improves year after year for pennies on the dollar.”
This comprehensive guide details how to build and fill raised garden beds on a sensible budget, explains the chemistry of DIY soil blending, reviews proven equipment, and shares high-density planting techniques that maximize your harvest from day one.
Why Raised Beds Outperform In-Ground Gardens
Before investing time and materials, it is valuable to examine why raised beds deliver superior productivity, particularly for small-space gardeners and homesteaders focused on food preservation.
+------------------------------------------------------------------------------------+
|                      RAISED BED ADVANTAGES AT A GLANCE                             |
+------------------------------------------------------------------------------------+
|  1. Superior Soil Aeration: Zero foot traffic means loose, uncompacted soil.       |
|  2. Rapid Spring Soil Warming: Elevated soil warms 2 to 3 weeks earlier in spring. |
|  3. Flawless Drainage: Heavy rainfall percolates freely, preventing root rot.      |
|  4. Ergonomic Comfort: Less bending and kneeling protects your back and joints.    |
|  5. Weed Barrier Security: Clear separation halts invasive lawn grass runners.    |
|  6. Microclimate Control: Easy to attach hoops for frost covers or shade netting.   |
+------------------------------------------------------------------------------------+
1. Complete Control Over Root Zone Nutrition
When you garden in the ground, you are at the mercy of whatever subsoil sits beneath your grass. Amending dense clay or nutrient-deficient sand takes years of arduous digging and compost incorporation.
With raised beds, you bypass native soil limitations immediately. You curate an optimal blend of organic matter, aeration minerals, and compost from the very first afternoon, creating a light, sponge-like soil structure where roots spread effortlessly.
2. Accelerated Spring Soil Warmth and Season Extension
Because raised beds sit elevated above ground level and are warmed along their sidewalls by ambient air and sunshine, the soil warms up two to three weeks earlier in late winter than surrounding ground soil.
This thermal advantage allows you to direct-sow cold-hardy carrots, spinach, radishes, and peas well before neighbors can even turn a shovel in waterlogged ground.
When autumn freezes approach, raised beds make it remarkably simple to install low hoop tunnels covered in greenhouse plastic, extending your fresh harvest into November and December.
To pair your raised bed planning with early indoor seedling propagation under lights, review our in-depth evaluation of the Best Seed Starting Kits Guide.
Materials Showdown: Galvanized Metal vs Untreated Wood vs Cedar
The framing material you select determines not only your initial upfront cost, but also how many years your beds will survive before rotting into the soil.
+------------------------------------------------------------------------------------+
|                         RAISED BED MATERIAL COMPARISON                             |
+------------------------------------------------------------------------------------+
|  A. Galvanized Coated Steel Kits                                                   |
|     * Lifespan: 20 to 30+ years without rotting.                                   |
|     * Cost: Low to Moderate (excellent long-term value).                           |
|     * Safety: 100% zinc-coated food safe; zero chemical leaching.                 |
|     * Assembly: Tool-free or basic wingnuts in under 30 minutes.                   |
|     * VERDICT: The premier budget choice for modern homesteaders.                 |
+------------------------------------------------------------------------------------+
|  B. Natural Rot-Resistant Cedar / Redwood                                          |
|     * Lifespan: 10 to 15 years.                                                    |
|     * Cost: Extremely High (often $250+ per single bed in raw lumber).             |
|     * Assembly: Requires power saws, drills, heavy framing screws.                 |
|     * VERDICT: Beautiful aesthetic, but financially prohibitive on a budget.       |
+------------------------------------------------------------------------------------+
|  C. Construction Spruce / Fir (Pine 2x4s or 2x6s)                                  |
|     * Lifespan: 2 to 4 years before fungal rotting and wood-boring beetle collapse.|
|     * Cost: Lowest upfront lumber cost.                                            |
|     * VERDICT: A financial trap; constantly rebuilding beds wastes money.          |
+------------------------------------------------------------------------------------+
The Truth About Treated Lumber in Food Gardens
Many budget-conscious beginners consider buying treated framing lumber (often marked as pressure-treated pine) from home improvement centers.
While modern pressure-treated wood no longer uses chromated copper arsenate (CCA), it is treated with micronized copper azole (MCA) or alkaline copper quaternary (ACQ).
While copper is a plant micronutrient, organic certification standards strictly prohibit treated wood in vegetable beds. If you choose wood, stick to untreated natural rot-resistant species like cedar, black locust, or juniper.
Why Galvanized Steel Has Revolutionized Budget Gardening
Over the past five years, modular galvanized steel raised beds have taken the gardening world by storm.
High-tensile corrugated steel coated in a thick, protective zinc alloy is impervious to rot, termites, carpenter ants, and burrowing rodents. Unlike wood, metal will not warp, twist, split, or rot after a rainy winter.
Modern galvanized beds feature rounded safety corners and soft rubber top trims, assemble in twenty minutes with basic hand bolts, and deliver a clean modern farmhouse aesthetic that elevates any backyard landscape.
How to Fill Raised Beds on a Budget: The Hugelkultur Revolution
The single biggest mistake new raised bed owners make is driving to a retail garden center and purchasing fifty plastic bags of commercial potting mix. At ten dollars per bag, filling an eight-by-four-foot raised bed that is two feet tall can easily cost over four hundred dollars.
Instead, experienced permaculturists use Hugelkultur (a German term meaning hill culture or mound culture).
Hugelkultur utilizes decaying organic woody debris from your yard to fill sixty percent of the bed volume for free, creating a self-watering, biologically active fungal sponge beneath your root zone.
+------------------------------------------------------------------------------------+
|                      HUGELKULTUR LAYERED FILLING STRATEGY                          |
+------------------------------------------------------------------------------------+
|                                                                                    |
|  [Layer 5: Top 6 to 8 Inches]   ->   Premium Growing Mix (Compost + Peat + Perlite) |
|  [Layer 4: 2 to 3 Inches]       ->   Finished Homemade or Bulk Compost / Leaf Mold  |
|  [Layer 3: 3 to 4 Inches]       ->   Green Nitrogen (Grass clippings, green leaves) |
|  [Layer 2: 4 to 6 Inches]       ->   Small Branches, Twigs, and Dry Brown Leaves    |
|  [Layer 1: Bottom 6 Inches]     ->   Heavy Hardwood Logs, Chunks, and Fallen Bark   |
|                                                                                    |
|  ==================== GROUND LEVEL (Cardboard Weed Barrier) ====================   |
+------------------------------------------------------------------------------------+
Step-by-Step Hugelkultur Layering Protocol
Layer 0: Ground Preparation and Weed Suppression
Clear the footprint where your raised bed will rest. You do not need to excavate the sod or till the grass.
Simply mow the area as short as possible and lay down three thick layers of plain, non-glossy corrugated cardboard, overlapping edges by six inches. Remove all plastic packing tape and shipping labels.
This cardboard layer smothers aggressive lawn grasses and weed seeds completely while welcoming subterranean earthworms to burrow upward into your bed.
Layer 1: Heavy Carbon (The Base Logs)
Collect large rotting logs, thick tree limbs, and fallen chunks of hardwood from your property, wooded edges, or local municipal yard waste drops. Lay these heavy logs directly on top of the cardboard at the bottom of the bed.
As these dense logs decompose over the next five to ten years, they act like giant underground sponges. During spring rainstorms, the porous rotting wood absorbs hundreds of gallons of water. In the dry heat of midsummer, deep plant roots tap into this subterranean water reserve, dramatically reducing your irrigation frequency.
Layer 2: Medium Branches and Twigs
Toss in smaller tree trimmings, perennial prunings, and dried pine cones to fill the open air gaps between the large bottom logs.
Tamp them down firmly with your boots to prevent excessive settling later.
Layer 3: Green Nitrogen Charge
Layer in fresh organic materials rich in nitrogen, such as untreated grass clippings, freshly plucked garden weeds that have not gone to seed, kitchen vegetable scraps, and green trimmings.
This nitrogen kickstarts microbiological activity and accelerates the breakdown of the woody carbon underneath.
Layer 4: Rough Compost and Leaf Mold
Add several inches of aged autumn leaves, straw, partially decomposed compost, or well-rotted livestock manure (horse, cow, or chicken manure that has aged for at least six months).
Water this layer deeply until water trickles through the bottom.
Layer 5: The Premium Growing Zone (Top 6 to 8 Inches)
This is the only layer where your vegetable seedlings and seeds will spend their initial weeks. Because roots need immediate, balanced nutrients and fine tilth, this top six to eight inches must be a high-quality growing blend.
By using the Hugelkultur method beneath it, you only need to purchase or mix a small fraction of the soil volume required by a full bed.
Crafting the Ultimate DIY Raised Bed Soil Mix
Rather than buying expensive premixed specialty soils, you can blend your own professional-grade raised bed potting mix in a wheelbarrow for half the cost.
The most dependable, time-tested framework for raised bed soil is based on the famous Square Foot Gardening Blend (also known as Mel’s Mix), adapted for budget homesteaders:
+------------------------------------------------------------------------------------+
|                    THE BALANCED THREE-PART SOIL FORMULA                            |
+------------------------------------------------------------------------------------+
|                                                                                    |
|   1/3 Compost Blend: Provides rich microbiology and continuous plant nutrients.    |
|   1/3 Coir or Peat Moss: Retains moisture and provides light, fluffy soil texture. |
|   1/3 Coarse Perlite or Vermiculite: Ensures permanent aeration and drainage.      |
|                                                                                    |
+------------------------------------------------------------------------------------+
1. The Compost Third (Diversity is Critical)
Compost is the biological powerhouse of your soil. The golden secret of fertile raised bed soil is never relying on a single source of compost.
If possible, blend three different compost varieties: homemade vegetable compost, aged steer manure compost, and mushroom compost or worm castings.
Each compost source brings a distinct microbiological community and nutrient spectrum, ensuring your vegetables receive a balanced diet of nitrogen, phosphorus, potassium, and trace minerals.
2. The Moisture Retention Third (Coconut Coir vs Peat Moss)
Sphagnum peat moss and compressed coconut coir blocks both perform exceptionally well at retaining moisture in raised beds.
Coconut coir is a sustainable agricultural byproduct with a neutral pH (around 6.0 to 6.8), meaning it will not alter soil acidity.
Sphagnum peat moss is slightly more acidic (pH 3.5 to 4.5), which is easily balanced by adding a handful of agricultural limestone or wood ash.
3. The Aeration Third (Perlite vs Pumice)
Never skip the aeration component. Without coarse perlite or pumice, organic matter compacts over a single season under heavy rain, turning dense and depriving roots of oxygen.
Perlite consists of volcanic glass expanded under intense heat; it never breaks down and keeps microscopic air channels open permanently.
Essential Equipment Reviews for Budget Raised Beds: 2026 Picks
To build, monitor, and protect your raised garden beds with complete confidence, having the right specialized equipment saves countless hours of labor and prevents costly gardening blunders.
Below are three verified, high-performance tools available on Amazon that deliver outstanding reliability and value for budget-conscious gardeners.
Land Guard 6x3x1ft Galvanized Metal Raised Garden Bed
Best for: Beginner and experienced gardeners building durable, high-yield beds on a budget
- Heavy-duty thickened galvanized steel resists rust for decades
- Open-bottom design promotes deep root growth and natural drainage
- Rubber safety edge strip protects hands during gardening
- Assembles quickly with included bolts and wingnuts
- Requires level ground preparation before filling
Building raised beds from cedar lumber often requires expensive carpentry equipment, heavy hauling, and hundreds of dollars in raw lumber that eventually rots away.
The Land Guard Galvanized Metal Raised Garden Bed delivers commercial-grade durability and clean modern aesthetics at an accessible price point.
Manufactured from thickened corrugated galvanized steel sheet metal coated in a resilient zinc alloy, this bed is completely immune to rotting, termites, mold, and weather cracking.
The open-bottom design allows vegetable roots to penetrate deeply into subsoil layers while guaranteeing that excess rainwater drains freely, preventing root suffocation during heavy spring downpours.
Assembly is refreshingly simple: the curved and straight panels fasten together in roughly twenty minutes using included stainless hardware.
A heavy-duty rubber safety trim strip slips over the top rim, protecting your hands, wrists, and clothing from scratches while you weed and harvest.
Sonkir 3-in-1 Soil Moisture, Light, and pH Tester (MS02)
Best for: Monitoring root-zone moisture, light levels, and soil pH without batteries
- No batteries or electricity required
- Dual-probe technology measures moisture and pH levels quickly
- Helps prevent overwatering and root rot in raised beds
- Easy-to-read color coded analog dial
- Probes must be wiped clean after every reading to prevent corrosion
The most frequent cause of vegetable failure in raised beds is improper watering and unbalanced soil pH. Novice gardeners often assume that dry surface soil means roots are thirsty, leading to chronic overwatering that suffocates roots and causes blossom end rot in tomatoes.
The Sonkir 3-in-1 Soil Moisture, Light, and pH Tester takes all guesswork out of soil management.
Operating entirely without batteries or electricity, this dual-probe mechanical instrument measures moisture levels deep down at root level (from dry level one to soggy level ten), evaluates ambient sunlight intensity, and checks soil acidity on an analog pH scale from 3.5 to 8.0.
Simply insert the probes four to six inches into your raised bed soil and read the dial instantly.
Knowing your exact root-zone moisture prevents underwatering during summer heat waves and stops fungal root rot before it damages your harvest.
ECOgardener Premium Heavy-Duty Weed Barrier Fabric
Best for: Lining garden bed pathways and preventing aggressive weeds while allowing water permeability
- Professional dual-layer needle-punched fabric blocks 99% of weeds
- High water and nutrient permeability prevents puddle stagnation
- Durable woven polypropylene resists tearing and UV breakdown
- Environmentally friendly chemical-free weed control
- Requires cutting with sharp scissors or a utility knife
Nothing ruins the joy of gardening faster than invasive lawn grasses, creeping Bermuda grass, and aggressive weeds invading your garden pathways and creeping up under your raised beds. Cheap thin plastic weed sheeting rips within weeks and prevents rainwater from absorbing into the earth.
The ECOgardener Premium Heavy-Duty Landscape Weed Barrier Fabric is the gold standard for pathway and garden perimeter weed control.
Engineered with a professional dual-layer needle-punched woven polypropylene design, it blocks ninety-nine percent of light to starve out weeds permanently while maintaining high permeability for water and air.
Rainwater soaks directly through into the groundwater table without forming stagnant surface puddles or muddy pathways.
Line your walking paths between your raised beds with this heavy-duty fabric, anchor it with metal staples, and top with three inches of cedar bark mulch or woodchips to create a clean, pristine, zero-maintenance garden walkway.
Equipment Comparison Matrix for Raised Bed Projects
To assist your project planning and budget allocation, the following table details the key features and specifications of these core tools:
| Product | Primary Purpose | Material / Build | Dimensions / Specs | Key Budget Advantage |
|---|---|---|---|---|
| Land Guard Raised Bed | Long-lasting elevated planting frame | Thickened galvanized steel with zinc coat | 6ft x 3ft x 1ft (or 8ft x 4ft options) | Never rots; lasts 20+ years for less than cedar lumber |
| Sonkir 3-in-1 Soil Tester | Precision moisture & pH monitoring | Copper & aluminum dual-probe sensor | Analog dial; zero batteries needed | Prevents costly plant death from overwatering and acidity |
| ECOgardener Weed Barrier | Pathway weed suppression & drainage | Dual-layer needle-punched woven poly | Heavy-duty commercial roll | Chemical-free weed elimination with high water permeability |
If you plan to harvest and store heirloom seeds from your raised bed varieties, explore our detailed companion tutorial on How to Save Seeds from Your Garden.
High-Density Planting Systems: Square Foot and Companion Spacing
To maximize the return on your raised bed investment, abandon traditional single-row farming layouts. In commercial farm fields, wide aisles are necessary so heavy tractors can drive between crops.
In a backyard raised bed, you never step into the growing zone. Because you can comfortably reach the center of a three-foot or four-foot wide bed from both sides, you can plant in intensive geometric grids that canopy the soil, shade out emerging weed seeds, and multiply your harvest yields.
+------------------------------------------------------------------------------------+
|                      SQUARE FOOT PLANTING DENSITY GUIDE                            |
|                       (Per 12-inch by 12-inch Garden Grid)                         |
+------------------------------------------------------------------------------------+
|  1 Plant per Square:                                                               |
|  * Tomatoes (staked/trellised), peppers, eggplants, broccoli, cabbage.             |
+------------------------------------------------------------------------------------+
|  4 Plants per Square:                                                              |
|  * Leaf lettuce, Swiss chard, sweet corn, bush beans, marigolds.                   |
+------------------------------------------------------------------------------------+
|  9 Plants per Square:                                                              |
|  * Spinach, bush peas, large beets, baby turnips.                                  |
+------------------------------------------------------------------------------------+
|  16 Plants per Square:                                                             |
|  * Carrots, radishes, scallions, garden garlic.                                    |
+------------------------------------------------------------------------------------+
Vertical Trellising: Multiplying Space Upward
The easiest way to double the square footage of a budget raised bed is to grow vertically.
Crops like vining indeterminate tomatoes, pickling cucumbers, pole beans, and small winter squashes consume enormous horizontal space if allowed to sprawl across the dirt.
Install cattle panels, electrical conduit arches, or sturdy wooden A-frame trellises along the north side of your raised beds so climbing vines do not cast shade over lower-growing lettuces and herbs.
Vertical trellising keeps fruits elevated off damp soil, eliminating slug damage and soil-borne fungal spores while making harvesting effortless at eye level.
For preserving heavy cucumber and tomato harvests from your raised beds, consult our guide on Fermentation for Beginners and our instructions on How to Start Canning.
Year-Round Raised Bed Maintenance and Soil Rejuvenation
Unlike in-ground soil, raised bed soil is an active biological sponge that slowly settles and oxidizes over time as the organic matter decomposes. Maintaining vigorous harvests year after year requires simple, low-cost rejuvenation habits.
+------------------------------------------------------------------------------------+
|                        SEASONAL SOIL REJUVENATION CYCLE                            |
+------------------------------------------------------------------------------------+
|  Spring: Add 2 inches of compost; verify pH with soil tester.                      |
|  Summer: Apply 2 inches of clean straw mulch to conserve moisture.                 |
|  Autumn: Top dress with aged manure and shredded autumn leaves.                    |
|  Winter: Sow a winter cover crop (hairy vetch, crimson clover) or cover with tarp. |
+------------------------------------------------------------------------------------+
1. The Autumn Top-Dress Habit
At the conclusion of the growing season, never leave raised bed soil exposed to pounding winter rain and snow, which leaches soluble minerals and erodes soil structure.
Instead, top-dress each bed with two inches of rich finished compost, shredded autumn leaves, or aged farm manure.
Over winter, freezing and thawing cycles pull rich humic acids down into the root zone, while earthworms break down organic matter, preparing fluffy, nutrient-dense soil for spring planting without any digging or tilling.
2. Monitoring Soil Compaction and Aeration
Never stand, sit, or kneel directly on raised bed soil. Keep long wooden boards nearby to distribute weight if you must lean across large beds.
Before spring planting, insert a broadfork or long garden digging fork vertically into the soil every six inches and gently rock the handle backward to crack open subsoil air fissures without turning the soil layers upside down.
Check soil moisture and pH with your Sonkir soil tester before planting to ensure your root zone sits in the optimal 6.2 to 6.8 pH range preferred by most garden vegetables.
Frequently Asked Questions About Budget Raised Beds
Do galvanized metal raised beds get too hot in summer and bake plant roots?
No, this is a common myth. Moist soil possesses immense thermal mass and high specific heat capacity, meaning it absorbs and distributes heat slowly.
While the exposed metal rim of a Land Guard raised bed can feel warm to the touch under direct midday sun, heat transfers only a few millimeters into the wet soil before dissipating.
In fact, metal beds reflect reflective solar heat away from the bed surface better than dark-painted wood or dark plastic containers. Agricultural university tests have confirmed that soil temperatures in galvanized metal beds do not differ significantly from wooden beds.
What is the ideal depth for a raised vegetable bed?
For most annual vegetables, a soil depth of twelve to fifteen inches is ideal.
Carrots, lettuces, radishes, onions, and bush beans concentrate ninety percent of their root mass in the top eight to ten inches of soil.
Deep-rooting crops like indeterminate heirloom tomatoes and winter squash send taproots two to three feet deep, which is why an open-bottom raised bed resting over native ground is vastly superior to a closed-bottom elevated planter table.
If you suffer from knee, hip, or back pain, taller two-foot or three-foot high beds allow you to garden while standing or sitting comfortably on a garden stool without bending.
Can I build raised beds directly over grass without removing the turf?
Yes, absolutely. Excavating sod is backbreaking, unnecessary labor that removes valuable native topsoil and beneficial soil organisms.
Simply scalp the grass with your lawnmower on the lowest setting, assemble your raised bed over the clipped turf, and line the entire base with three layers of thick brown corrugated cardboard before adding your Hugelkultur logs and soil.
The cardboard completely suffocates the grass and decomposes into rich organic matter within ninety days.
How often do I need to water raised beds compared to in-ground gardens?
Because raised beds feature porous, well-draining soil and elevated sidewalls exposed to warm ambient air, they dry out faster than heavy in-ground clay.
During the peak of summer, raised beds typically require watering two to three times per week with deep soaker hoses rather than daily shallow sprinkler spraying.
Applying a three-inch layer of clean straw, shredded leaves, or wood shavings across the soil surface reduces evaporation by up to fifty percent, keeping soil moist and cool between waterings.
How do I prevent pests like gophers and voles from burrowing into raised beds?
If burrowing rodents like gophers, moles, or voles are common in your neighborhood, staple a layer of half-inch galvanized hardware cloth (wire mesh) across the bottom of your raised bed before setting it on the ground and filling it.
Water and earthworms can pass freely through the wire mesh, but burrowing rodents cannot chew through galvanized steel wire to reach your sweet potato or carrot crops.
Final Verdict and Your Weekend Project Blueprint
Creating an abundant, high-yield vegetable garden should never require a second mortgage or complicated carpentry skills.
By combining the remarkable longevity of modern corrugated metal with the cost-free organic richness of Hugelkultur filling layers, you can build a stunning, resilient homestead garden that produces crisp organic food for decades.
Invest your resources where they deliver maximum impact:
- Construct durable, rot-proof growing frames with the Land Guard Galvanized Metal Raised Garden Bed.
- Eliminate watering guesswork and maintain balanced root-zone pH using the Sonkir 3-in-1 Soil Tester.
- Keep pathways pristine and halt creeping weeds permanently with ECOgardener Heavy-Duty Landscape Weed Barrier Fabric.
Gather your cardboard, collect fallen tree branches from your yard, assemble your galvanized beds this weekend, and experience the pure satisfaction of growing abundant food in fertile soil you built with your own hands.
Explore Related Guides in Our Network
- Raise healthy, stocky seedlings indoors: Best Seed Starting Kits Guide
- Harvest and preserve your own heirloom seeds: How to Save Seeds from Your Garden
- Turn heavy vegetable yields into shelf-stable provisions: Best Vacuum Sealers for Garden Harvest
- Safe water bath and pressure canning basics: How to Start Canning
- Return to the Backyard Gardening Hub or explore our Food Storage Hub