Fermentation for Beginners: Essential Equipment, Food Safety, and First Recipes
Master the art and science of wild lacto-fermentation at home with safe equipment, precise salt calculations, and foolproof beginner recipes.
Disclosure: This post contains affiliate links. As an Amazon Associate, we earn from qualifying purchases at no extra cost to you. We only recommend products we believe are genuinely useful for home food preservation.
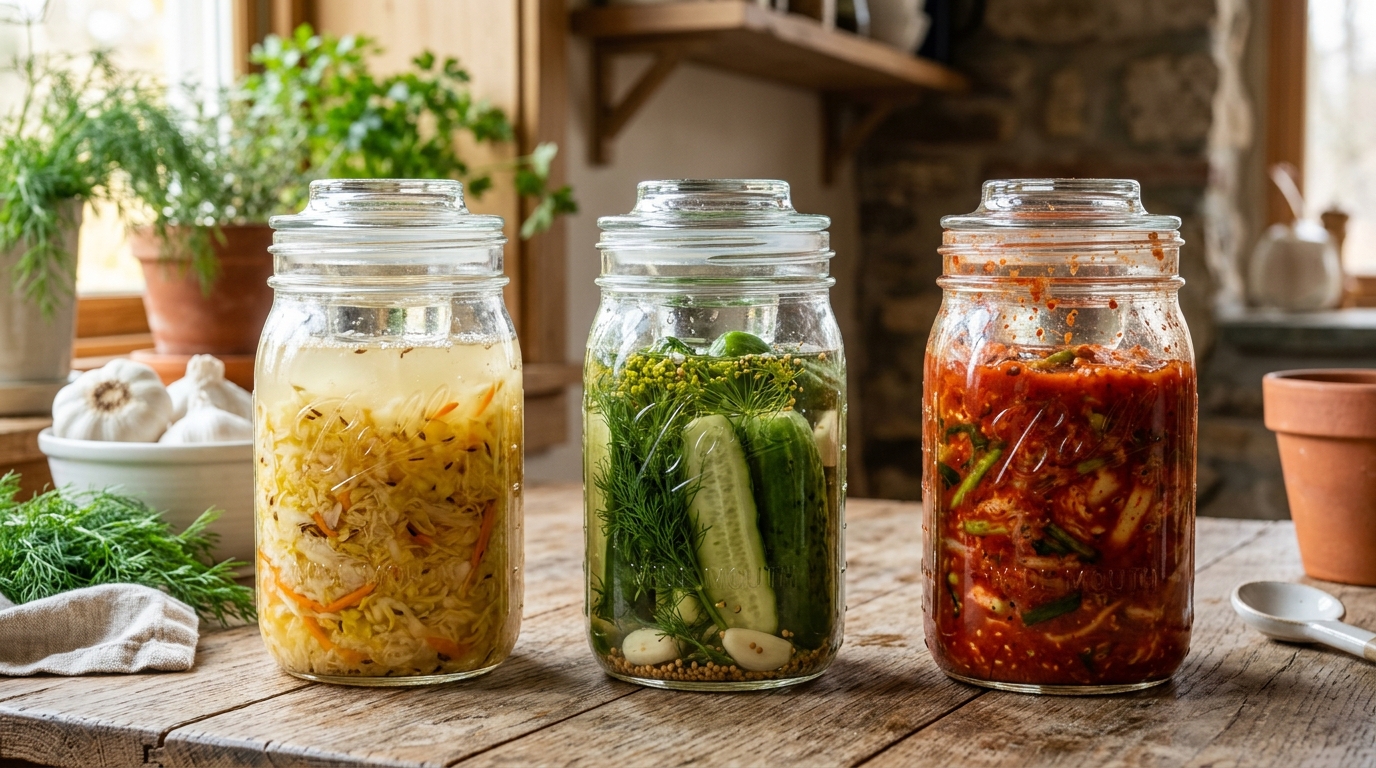
Long before the invention of mechanical refrigeration, electric freezers, or modern pressure canning, human civilizations across every continent preserved their seasonal garden harvests through the magic of biological fermentation. From the tangy, crisp sauerkrauts of Central Europe to the zesty, spicy kimchis of Korea and the sour crocks of traditional kosher dill pickles, fermentation has sustained human health and nourishment for thousands of years.
In our modern era of ultra-processed food and sterile packaging, vegetable fermentation is experiencing a magnificent renaissance in home kitchens. Gardeners and culinary enthusiasts are discovering that lacto-fermentation does something no other food preservation method can achieve: it preserves fresh vegetables while simultaneously enhancing their nutritional bioavailability, creating complex savory flavor profiles, and generating billions of living, gut-friendly probiotic microorganisms.
Unlike home canning, which uses intense thermal heat to sterilize foods and destroy all microscopic life, vegetable fermentation is a living preservation method. You actively cultivate beneficial bacteria, creating an acidic, biological environment where dangerous pathogens cannot survive.
However, for beginners standing over their first head of cabbage or basket of pickling cucumbers, the prospect of leaving raw vegetables sitting at room temperature on a kitchen counter for three weeks can feel intimidating. Worries about dangerous molds, bad odors, or foodborne illness cause many aspiring preservers to hesitate.
This comprehensive guide removes all mystery and anxiety from the process. We explain the exact microbiological science of lacto-fermentation, evaluate the essential modern equipment that guarantees success, provide foolproof mathematical brine calculation charts, and walk you through tested, beginner-friendly recipes that yield crisp, delicious, probiotic-rich ferments on your very first attempt.
The Microbiological Science: How Beneficial Bacteria Preserve Food
To ferment vegetables with complete confidence, you do not need a degree in microbiology, but you do need to understand the simple biological mechanism taking place inside your glass jars.
Every vegetable harvested from your backyard garden, whether it is a cabbage leaf, a carrot root, or a pickling cucumber, is naturally covered with microscopic populations of wild microorganisms. These include beneficial lactic acid bacteria, predominantly species from the genera Leuconostoc, Lactobacillus, and Pediococcus, alongside ambient wild yeasts and harmless airborne bacteria.
In open air, ambient oxygen allows aerobic spoilage organisms and molds to feed on the vegetable sugars, breaking down plant cellular tissues into soft, decaying compost.
Lacto-fermentation halts this decay by radically transforming the physical environment through two simple interventions: salt and anaerobic submersion.
The Three Phases of Lactic Fermentation
When you submerge shredded vegetables below a clean salt brine inside an airtight container, a predictable three-phase biological succession begins:
- Phase One (Days One to Three): The initial salt concentration suppresses harmful, salt-sensitive putrefactive bacteria while allowing salt-tolerant Leuconostoc mesenteroides bacteria to flourish. These pioneering microbes consume natural plant sugars (fructose and glucose) and produce carbon dioxide gas alongside mild lactic and acetic acids. As carbon dioxide bubbles bubble to the surface, oxygen is purged from the headspace, and the pH begins to fall.
- Phase Two (Days Three to Seven): As the liquid becomes noticeably acidic with a pH dropping below 5.0, the environment becomes too hostile for Leuconostoc bacteria. Hardier species, primarily Lactobacillus plantarum and Lactobacillus brevis, take over the colony. These robust bacteria rapidly metabolize remaining sugars, generating large volumes of clean lactic acid that drive the pH down sharply.
- Phase Three (Days Seven and Beyond): Once the pH falls below the critical threshold of 4.6 (and typically down to 3.5 to 3.8), the brine becomes intensely acidic. In this acidic environment, harmful foodborne pathogens, including Salmonella, Escherichia coli, Listeria monocytogenes, and Clostridium botulinum, are biologically incapable of surviving or reproducing. The ferment reaches a stable equilibrium, locking in crisp textures and savory sour flavors that keep for many months.
USDA Microbial Acid Safety Rule: Clostridium botulinum spores cannot germinate or produce toxins in an environment with a verified pH level below 4.6. Properly executed lacto-fermentation naturally drives vegetable pH levels down between 3.4 and 4.0 within a few days, creating a self-sterilizing biological barrier that is remarkably safe when vegetables remain completely submerged below the brine.
If you are exploring alternative methods of long-term preservation that require room-temperature shelf storage, explore our complete guide on How to Start Canning at Home and our technical analysis of Water Bath vs Pressure Canning.
Essential Modern Equipment: The Holy Trinity of Fermentation
In past generations, homesteaders fermented vegetables in massive open stone crocks kept in damp cellars. These traditional crocks required daily skimming of gray surface molds and constant monitoring, frequently resulting in spoiled batches.
Today, modern food-grade accessories have elevated home fermentation into an exact, clean, and virtually foolproof science. You do not need expensive commercial fermenters; you simply need the correct three components, often referred to as the holy trinity of home fermentation.
1. The Container: Ball Wide-Mouth Mason Jars
Ball Wide-Mouth Mason Jars (Quart 32 oz)
Best for: Canning, fermenting, and dry storage
- Classic, trusted brand
- Multi-purpose
- Widely available replacement lids
- Glass can break if mishandled
The foundation of any successful home fermentation setup is high-quality, transparent, non-reactive glass. Metal containers must never be used because lactic acid reacts corrosively with aluminum, copper, and iron. While glazed stoneware crocks are charming, glass mason jars offer an irreplaceable advantage for beginners: complete visual transparency.
Being able to inspect your ferment from all angles without opening the lid allows you to monitor rising carbon dioxide bubbles, check brine levels, verify that vegetables remain submerged, and spot any potential mold formation before it becomes a problem.
Why Wide-Mouth Jars Are Mandatory
Standard regular-mouth jars feature a narrow, tapered neck that curves inward toward the mouth. This narrow opening makes it nearly impossible to insert your hand, pack shredded cabbage tightly, or seat solid glass weights cleanly.
The Ball Wide-Mouth Mason Jars feature a completely straight, uniform cylindrical opening measuring three inches across. This generous opening provides several distinct advantages:
- Tamping and Compacting: Allows you to insert wooden kraut pounders or your own knuckles to press vegetables down with significant pressure, expelling trapped air pockets and forcing natural juices to rise above the cabbage.
- Accessory Compatibility: Standardizes your kitchen around universal wide-mouth dimensions, ensuring that silicone airlock lids and glass weights seat with precision.
- Volume Flexibility: Quart (thirty-two ounce) jars are the ideal starting size for cucumber pickles, sliced carrots, and jalapenos, while half-gallon (sixty-four ounce) wide-mouth jars accommodate large heads of garden cabbage.
2. The Atmosphere Controller: Masontops Pickle Pipes Airlock Lids
Masontops Pickle Pipes Airlock Fermentation Lids
Best for: Beginners starting with sauerkraut, kimchi, or pickles
- Simple airlock design
- Fits standard mason jars
- No burping required
- Only for fermentation, not canning
During active fermentation, beneficial bacteria produce substantial volumes of carbon dioxide gas. In an airtight, rigidly sealed container, this gas builds up immense internal pressure. If you screw a standard metal canning lid on tightly and forget to vent it, the pressure can shatter the glass jar, scattering brine and glass across your kitchen.
Conversely, if you leave the lid loose or cover the jar with a simple piece of cheesecloth, ambient oxygen enters the container constantly. Surface molds and wild Kahm yeasts thrive in the presence of oxygen, colonizing the top layer of your vegetables.
The Masontops Pickle Pipes solve both problems simultaneously with an ingenious, waterless one-way silicone valve:
The Physics of Waterless Airlocks
The Pickle Pipe looks like a low-profile silicone disc featuring a tiny molded nipple on its top surface. Inside this nipple is a microscopic slit valve engineered to open under positive pressure:
- Automated Degassing: As carbon dioxide accumulates inside the jar, internal positive pressure builds. Once pressure reaches a fraction of a pound per square inch, the silicone slit opens outward, venting the carbon dioxide smoothly into the room.
- Zero Oxygen Ingress: Because ambient room pressure is lower than the jar internal pressure, atmospheric air cannot push its way backward through the slit. The valve snaps tightly shut the moment gas release finishes, maintaining a pure carbon dioxide blanket above the brine.
- No Burping Required: You never have to manually open or burp your jars each morning. You can leave your jars unattended for weeks without any risk of explosion or mold contamination.
- Dishwasher Safe and Compact: Unlike tall, fragile plastic three-piece brewing airlocks that require filling with water and break easily in kitchen cupboards, Pickle Pipes sit nearly flat against the jar, fitting effortlessly on standard pantry shelves.
3. The Submersion Anchor: Masontops Pickle Pebbles Glass Weights
Masontops Pickle Pebbles Wide Mouth Glass Fermentation Weights
Best for: Keeping submerged fermenting vegetables below the brine surface
- Heavy lead-free soda lime glass
- Finger grip grooved top for easy removal
- Fits all wide mouth mason jars perfectly
- Glass must be handled carefully during washing
If there is a single universal law in vegetable fermentation, it is this simple maxim: under the brine, all is fine; above the brine, mold will dine.
Regardless of how effective your airlock lid may be, tiny shreds of cabbage or floating vegetable seeds that break through the surface of the liquid and contact whatever air pocket remains will inevitably dry out, oxidize, and develop fuzzy mold colonies.
The Masontops Pickle Pebbles are purpose-built glass weights engineered specifically to prevent this failure:
Engineering and Safety Highlights
- Lead-Free Soda-Lime Glass: Unlike porous river rocks, ceramic pieces, or glazed tiles that can leach heavy metals and toxic chemicals into acidic brine, Pickle Pebbles are manufactured from completely inert, pure food-grade soda-lime glass that never absorbs odors or colors.
- Substantial Calibrated Weight: Weighing approximately six ounces each, these solid glass discs possess the exact mass required to hold buoyant, gas-filled shredded vegetables pinned firmly below the brine surface.
- Finger Grip Grooves: Removing a slick, wet glass disc from inside a narrow jar can be frustrating. Pickle Pebbles feature molded finger grip ridges along their upper rim, allowing you to pinch and lift the weight cleanly out of the jar with zero slippage.
- Precise Wide-Mouth Fit: Sized to match the interior diameter of wide-mouth jars with just enough perimeter clearance for rising gas bubbles to escape past the sides.
Technical Equipment Comparison: Traditional vs Modern Methods
To help you understand why modern specialized tools make such a dramatic difference in preservation reliability, compare the traditional open-air methods with modern sealed systems:
| Preservation Variable | Traditional Open Crock Method | Standard Ball Lid Manual Burping | Modern Mason Jar + Airlock + Weight |
|---|---|---|---|
| Container Material | Ceramic Stoneware (Opaque) | Clear Glass Jar | Clear Glass Jar (Full Visibility) |
| Oxygen Barrier | Poor (Open surface exposed to room air) | Moderate (Vented manually daily) | Superior (Continuous one-way vacuum seal) |
| Risk of Surface Mold | Very High (Requires daily skimming) | Moderate (Oxygen enters during burping) | Near Zero (Anaerobic CO2 blanket) |
| Explosion Hazard | None (Open top) | High (If forgotten for multiple days) | Zero (Automated pressure relief valve) |
| Submersion Control | Unglazed stones or wooden plates | None (Vegetables float freely) | Heavy Lead-Free Glass Pebbles |
| Countertop Footprint | Massive (Takes up large floor/counter zone) | Minimal | Compact (Fits on standard cabinet shelf) |
| Beginner Success Rate | 60% to 70% | 75% to 80% | 98%+ Reliable Repeatability |
The Chemistry of Salt: Brine Percentages and Water Quality
Salt is not merely a flavoring agent in fermentation; it is the fundamental chemical governor that dictates which microscopic species are permitted to reproduce. Understanding how to calculate salt concentrations accurately is the single most important skill a beginner can master.
Why Salt Type Is Crucial
Never use standard commercial table salt for vegetable fermentation. Table salt contains added iodine and anti-caking agents such as sodium aluminosilicate or yellow prussiate of soda:
- Iodine: Acts as a potent antibacterial chemical that inhibits and stunts the growth of beneficial lactic acid bacteria, resulting in sluggish, failed ferments.
- Anti-Caking Chemicals: Do not dissolve cleanly in water, precipitating out of solution into a cloudy, chalky sediment that sits at the bottom of your jar and imparts bitter mineral off-tastes.
Always choose pure, unrefined salts containing zero additives:
- Pickling and Canning Salt: Pure granulated sodium chloride. Dissolves rapidly in room-temperature water without clouding.
- Coarse Kosher Salt (Diamond Crystal or Morton): Excellent choice, but remember that grain sizes vary dramatically between brands. Always measure by weight in grams rather than volume in tablespoons.
- Pure Sea Salt or Himalayan Pink Salt: Contains natural trace minerals that can help preserve the cellular crispness of vegetables.
Water Quality: Eliminating Chlorine and Chloramines
Municipal tap water frequently contains dissolved chlorine or chloramine added by water treatment facilities to kill bacteria. If your tap water contains enough chlorine to kill pathogens in municipal pipes, it will kill the delicate lactic acid bacteria on your garden vegetables just as efficiently.
- Free Chlorine: Can be eliminated simply by boiling your water for ten minutes, or by leaving an open pitcher of tap water sitting on your counter for twenty-four hours to allow the chlorine gas to dissipate naturally.
- Chloramines: Many modern municipal water systems now use chloramines (chlorine bonded to ammonia), which do not evaporate into air. If your city uses chloramines, run your water through a high-grade activated carbon filter, or purchase inexpensive distilled or reverse-osmosis water from your local grocer.
The Universal Brine Calculation Table
Different vegetables demand different salt concentrations based on their water content, skin thickness, and susceptibility to softening.
There are two primary ways to salt ferments:
- Dry Salting (By Vegetable Weight): Used for shredded vegetables with high internal moisture, such as cabbage for sauerkraut. Salt is sprinkled directly onto the shredded vegetables, massaged vigorously, and left to draw out natural cellular juices through osmosis. Standard ratio: 2.0% to 2.5% of vegetable mass.
- Wet Brine Solution (By Water Weight): Used for whole, chunked, or firm vegetables that cannot be massaged, such as whole cucumbers, carrots, cauliflower florets, and green beans. Clean water is mixed with measured salt to create a specific percentage brine, which is poured over the vegetables.
Use this reference table to mix accurate wet brines for your quart jars:
| Desired Brine Strength | Grams of Salt per Liter Water | Grams of Salt per Quart Water | Best Suited Garden Vegetables |
|---|---|---|---|
| 2.0% Brine | 20 Grams | 19 Grams (Approx 1 Tablespoon fine salt) | Soft vegetables, sliced zucchini, shredded carrots |
| 2.5% Brine | 25 Grams | 24 Grams (Approx 1.25 Tablespoons fine salt) | Green beans, asparagus spears, whole cherry tomatoes |
| 3.0% Brine | 30 Grams | 28 Grams (Approx 1.5 Tablespoons fine salt) | Traditional crunchy sour pickles, garlic cloves, radishes |
| 3.5% Brine | 35 Grams | 33 Grams (Approx 1.75 Tablespoons fine salt) | Traditional kosher dill cucumbers, hot peppers, turnip roots |
| 5.0% Brine | 50 Grams | 47 Grams (Approx 2.5 Tablespoons fine salt) | Long-term chili pepper mash for hot sauce, green olives |
Step-by-Step Recipe 1: Foolproof Homemade Sauerkraut
Sauerkraut is the ultimate training ground for novice fermenters. Because fresh cabbage contains abundant natural moisture and an exceptionally dense population of indigenous Lactobacillus bacteria, it ferments vigorously with minimal complexity.
Ingredients and Equipment Required
- One medium head of fresh green cabbage (approximately two to two and a half pounds).
- Non-iodized fine sea salt or pickling salt (calculated at exactly two percent of trimmed cabbage weight).
- One teaspoon caraway seeds or juniper berries (optional traditional flavoring).
- One Ball Wide-Mouth Quart Mason Jar.
- One Masontops Pickle Pipe Airlock Lid with metal screw band.
- One Masontops Pickle Pebble Glass Weight.
- Digital kitchen gram scale and large stainless steel mixing bowl.
Step-by-Step Execution Protocol
- Inspection and Trimming: Discard the wilted, dirty outer leaves of the cabbage. Peel off two clean, intact whole outer leaves and set them aside on a plate; you will use these later as a natural vegetable follower. Cut the cabbage head into quarters and slice away the hard central core.
- Precision Weighing: Place your large mixing bowl on the digital scale and zero the tare weight. Slice the cabbage into thin, uniform ribbons (about one-eighth of an inch thick) using a sharp chef knife or mandoline slicer. Transfer all shredded cabbage into the bowl. Note the exact weight in grams.
- Calculating Salt: Multiply the cabbage weight in grams by 0.02. For example, if your shredded cabbage weighs exactly 1,000 grams, you require precisely 20 grams of salt. Sprinkle the weighed salt evenly over the shredded cabbage.
- The Massage Technique: Using clean hands, toss the cabbage to distribute the salt. Allow the bowl to sit undisturbed for fifteen minutes. The salt will begin drawing water out of the plant cells via osmosis. After resting, begin massaging and kneading the cabbage vigorously with your fists, squeezing handfuls tightly. Continue for five to eight minutes until the cabbage breaks down, collapses in volume by half, and produces a generous pool of liquid brine at the bottom of the bowl.
- Packing the Jar: Transfer handfuls of salted cabbage into your sanitized wide-mouth jar. After adding each handful, use your knuckles or a wooden tamper to compress the cabbage firmly into the bottom, forcing out trapped air bubbles. Continue packing until the cabbage reaches the shoulder of the jar, leaving approximately two inches of headspace. Pour all remaining brine from the bowl over the cabbage.
- Seating the Follower and Weight: Take one of the clean reserved cabbage leaves from step one and fold it into a circle matching the jar diameter. Lay this leaf directly across the shredded cabbage; this acts as a vegetable follower, preventing small shreds from floating upward. Place your Pickle Pebble glass weight squarely on top of the follower leaf. Press down firmly until the liquid brine rises half an inch above the glass weight.
- Sealing with the Airlock: Wipe the glass rim clean with a damp towel. Seat your Pickle Pipe silicone lid over the jar mouth, and screw down the metal band finger-tight. Place the jar in a warm, dark pantry cabinet (ideal temperature between sixty-eight and seventy-two degrees Fahrenheit).
- The Fermentation Timeline:
- Days 1 to 3: Microscopic bubbles appear throughout the cabbage ribbons. The brine may turn slightly cloudy, which is a healthy sign of bacterial colonization.
- Days 4 to 7: Brine becomes milky, aromas turn pleasantly tangy and acidic, and liquid may expand slightly.
- Days 14 to 21: Fermentation stabilizes. The cabbage turns translucent golden-yellow. Sample the sauerkraut with a clean fork. When it reaches your preferred level of crisp crunch and sour tang, remove the airlock, screw on a standard solid lid, and move the jar to your refrigerator. Cold storage slows bacterial metabolism by ninety-nine percent, keeping your kraut fresh and crisp for up to one year.
Step-by-Step Recipe 2: Traditional Crisp Deli Garlic Dill Pickles
Nothing matches the snap and pungent complexity of authentic fermented dill pickles. Unlike grocery store vinegar pickles, which are heated and flavored with processed acetic acid, fermented pickles owe their sourness entirely to natural lactic acid.
The primary obstacle in cucumber fermentation is preventing softness and hollow cavities. Follow this tested protocol to guarantee crunchy pickles every time.
Ingredients and Equipment Required
- One and a half pounds of small, firm Kirby pickling cucumbers (never use waxed slicing cucumbers).
- Four cloves of fresh garlic, smashed and peeled.
- Four heads of fresh flowering dill, or two tablespoons dried dill seeds.
- One teaspoon whole black peppercorns.
- One-half teaspoon mustard seeds.
- The Secret Crunch Ingredient: Two fresh grape leaves, oak leaves, blackberry leaves, or one bag of pure black tea (these contain natural tannins that inhibit pectinase enzymes responsible for softening cucumber skins).
- One quart non-chlorinated water mixed with thirty-three grams of pickling salt (creating a 3.5% brine).
- Wide-mouth quart mason jar, Pickle Pipe lid, and Pickle Pebble glass weight.
Step-by-Step Execution Protocol
- Blossom End Removal: Wash cucumbers gently in ice-cold water. Using a paring knife, slice off a razor-thin sliver (about one-sixteenth of an inch) from the blossom end of each cucumber. The blossom end contains active enzymes that cause pickles to soften during fermentation.
- Ice Water Crisp Soaking: Soak the trimmed cucumbers in a bowl of ice water for thirty minutes before packing. This restores turgor pressure to cellular walls.
- Loading the Aromatics: Place the smashed garlic cloves, peppercorns, mustard seeds, fresh dill, and one grape leaf into the bottom of your clean wide-mouth jar.
- Packing the Cucumbers: Pack cucumbers vertically into the jar as tightly as possible. Wedge them together so they cannot shift. If necessary, slice long cucumbers in half or trim them to fit below the jar shoulder, maintaining one and a half inches of headspace.
- Adding Tannins and Weight: Place the second grape leaf across the top of the packed cucumbers. Rest your Pickle Pebble glass weight on top.
- Pouring the Brine: Pour the prepared 3.5% salt brine over the cucumbers until the liquid completely submerges both the vegetables and the glass weight by at least one-half inch.
- Sealing and Monitoring: Attach your Pickle Pipe airlock. Keep the jar away from direct sunlight at sixty-five to seventy degrees Fahrenheit.
- Ferment for five to seven days for half-sour pickles, or ten to fourteen days for full-sour deli pickles. Transfer to cold refrigerator storage immediately upon reaching desired sourness.
Troubleshooting Guide: Identifying Good Bacteria, Mold, and Kahm Yeast
The greatest source of beginner anxiety is distinguishing between harmless normal fermentation phenomena and dangerous spoilage. Keep this visual diagnostic guide handy:
                  ┌──────────────────────────────────────────────┐
                  │ Visual Surface Inspection of Fermentation    │
                  └──────────────────────┬───────────────────────┘
                                         │
                 Is there a growth on the brine surface?
                                         │
                    ┌────────────────────┴────────────────────┐
                   YES                                       NO
                    │                                         │
        What does it look like?                         Brine is cloudy with
                    │                                   white sediment at bottom?
     ┌──────────────┴──────────────┐                          │
White, thin, flat,              Fuzzy, raised, hairy,   NORMAL BACTERIAL SEDIMENT
powdery, wrinkly film?          circular colonies       (Dead lactic acid cells;
     │                          (green, black, pink)?   entirely safe and healthy!)
     │                                 │
KAHM YEAST                         TRUE MOLD
(Harmless wild yeast;           (Hazardous mycotoxins;
skim carefully off brine,       discard the entire batch
check aroma and texture)        safely in compost)
1. Kahm Yeast (Harmless but Annoying)
- Visual Appearance: A thin, flat, chalky-white film spread across the liquid surface, often displaying delicate geometric wrinkles or spiderweb patterns. It is never fuzzy or raised.
- Cause: Wild, aerobic ambient yeasts that colonize the surface when trace oxygen is present.
- Remedy: Kahm yeast is non-toxic and harmless to human health, but if left unmanaged, it can impart stale, yeasty off-flavors and soften vegetables. Skim it off cleanly using a sterilized spoon. Wipe the inside neck of the jar with a clean paper towel dipped in vinegar, reseat the airlock, and ensure the vegetables remain submerged.
2. True Surface Mold (Dangerous)
- Visual Appearance: Fuzzy, velvety, raised circular spots that are dark green, charcoal black, blue, yellow, or bright pink.
- Cause: Fungal spores germinating on vegetable matter exposed to atmospheric air.
- Remedy: Zero tolerance. Unlike hard block cheeses where surface mold can be carved off, liquid brine allows microscopic fungal filaments and chemical mycotoxins to circulate throughout the entire jar. If you spot fuzzy, colorful mold on your ferment, do not attempt to scrape it off; discard the entire contents into your compost bin, sanitize your jar thoroughly, and start fresh.
3. Cloudy Brine and White Bottom Sediment (Completely Normal!)
Beginners frequently panic when their crystal-clear salt brine turns cloudy and milky after three days, eventually forming a thick layer of chalky white powder across the bottom of the jar.
- This is entirely normal, healthy, and desirable.
- The cloudiness represents billions of active Lactobacillus bacteria suspended in the brine. The white sediment at the bottom is simply spent lactic acid bacteria that have finished their life cycle and settled out of solution. It is proof positive of a vigorous, successful fermentation.
Temperature Control and Seasonal Fermentation Management
Temperature is the invisible throttle of microbial fermentation. Lactic acid bacteria thrive within a specific thermal window:
- The Dangerously Cold Zone (Below 60°F / 15°C): Bacterial metabolism slows dramatically. Fermentation may stall completely, allowing cold-tolerant molds to take hold before the pH drops below 4.6.
- The Ideal Goldilocks Zone (65°F to 72°F / 18°C to 22°C): The sweet spot for home kitchens. Flavor development is smooth, complex, and crisp. Cabbage ferments steadily over three weeks without softening.
- The Accelerated Warm Zone (Above 78°F / 25°C): Bacterial metabolism accelerates rapidly. While the pH drops quickly, high temperatures activate natural pectinase enzymes that break down plant cell walls, transforming crisp vegetables into soft, mushy, rubbery pickles with overly sharp, vinegary tastes.
During hot summer harvest months, place your fermenting jars in the coolest room of your house, such as a finished basement, a low pantry cabinet near the floor, or inside an insulated picnic cooler with a single frozen ice pack rotated daily to maintain temperatures around sixty-eight degrees.
Frequently Asked Questions About Fermentation
Can lacto-fermentation produce botulism?
According to food safety scientists and the USDA, there has never been a documented case of foodborne botulism from raw vegetable lacto-fermentation in modern history when proper salt ratios are observed. Clostridium botulinum is an obligate anaerobe that requires low acidity (pH above 4.6) to produce toxins. Active lactic fermentation rapidly drops the pH to between 3.4 and 4.0 within forty-eight to seventy-two hours, an acidic threshold that permanently neutralizes botulism spores.
Can I can my fermented sauerkraut in a water bath canner so it lasts on the shelf?
Technically yes, but doing so destroys the greatest benefit of fermented foods. Processing fermented sauerkraut in a boiling water canner heats the contents above one hundred and eighty degrees Fahrenheit, which instantly pasteurizes and kills all living probiotic bacteria and destroys delicate heat-sensitive enzymes. To preserve the live gut-healthy probiotics and crunchy texture, simply store finished ferments in a cold refrigerator or cool root cellar, where they remain stable for six to twelve months without heat processing.
Why are my cucumber pickles soft and mushy instead of crisp?
Mushy fermented pickles are caused by four common mistakes: failing to slice off the enzyme-rich blossom end, fermenting at temperatures above seventy-five degrees Fahrenheit, using an overly weak salt brine below three percent, or omitting natural tannin sources like grape leaves or oak leaves. Tannins naturally bind to vegetable cell structures and inhibit pectin-degrading enzymes.
How do I know when my ferment is finished?
Fermentation is a matter of personal culinary taste rather than a rigid calendar date. Begin tasting your ferment after five days using a clean fork (never double-dip or insert your fingers). If you prefer a crisp, mild, fresh vegetable taste, move it to the refrigerator early. If you prefer a deep, complex, delightfully sour tang, let it continue fermenting on the counter for two to four weeks.
Do I need to buy a starter culture to ferment vegetables?
No. Fresh garden vegetables naturally carry all the wild lactic acid bacteria necessary for fermentation on their skins. Commercial powdered starter cultures are required for dairy ferments (yogurt and cheese) or meat curing (salami), but vegetable ferments produce outstanding, complex results using purely wild, indigenous microbial populations.
Is the liquid brine safe to drink?
Not only is it safe, it is exceptionally nutritious! Fermentation brine is packed with living probiotic bacteria, digestive enzymes, electrolytes, and bioavailable vitamins. Fermenters frequently save leftover sauerkraut and pickle brine to use as tangy salad dressing bases, meat tenderizers, or daily gut-health tonic shots.
Can I use iodized salt if it is all I have in my pantry?
Do not use iodized salt. Iodine is an intentional antimicrobial additive that severely inhibits bacterial colonization. Using iodized salt frequently leads to stalled ferments, dark discoloration, and foul-smelling bacterial spoilage. Spend a few dollars on pure pickling salt or coarse kosher salt to protect your harvest.
What should I do if the brine level drops below my vegetables?
During the first forty-eight hours, vegetables absorb liquid. If your vegetables become exposed to air, prepare a small batch of fresh salt brine matching your initial concentration (for example, dissolve one teaspoon of pickling salt in one cup of non-chlorinated water), pour it into the jar until the weight is submerged again by half an inch, and reseal your airlock.
Final Thoughts and Next Steps in Food Preservation
Mastering wild vegetable fermentation restores a timeless human connection to natural biological systems. With a modest investment in quality wide-mouth glass jars, reliable waterless silicone airlocks, and solid glass weights, you can transform ordinary backyard harvests into vibrant, gut-healthy, artisan provisions with zero risk and effortless maintenance.
As your pantry fills with jars of golden caraway sauerkraut and crunchy garlic dill pickles, you will find yourself viewing every vegetable in your garden through the lens of creative preservation.
To expand your preservation skills even further:
- Explore the world of shelf-stable pantry provisions with our Best Pressure Canners Guide.
- Master freezer packaging and eliminate food waste by reading our detailed review of the Best Vacuum Sealers for Garden Harvest.
- Learn the fundamental differences between canning styles in our guide to Water Bath vs Pressure Canning.
- Return to our complete Food Preservation Hub to access all guides, troubleshooting checklists, and preservation frameworks.
Embrace the bubbles, respect the brine, and enjoy the remarkable flavors of living, handcrafted fermented food.