How to Start Canning: A Beginner's Guide to Putting Up Your First Jars
Canning turns a summer windfall into a pantry that feeds you all winter. Here's how to start safely — without buying gear you don't need.
Disclosure: This post contains affiliate links. As an Amazon Associate, we earn from qualifying purchases at no extra cost to you. We only recommend products we believe are genuinely useful for home food preservation.
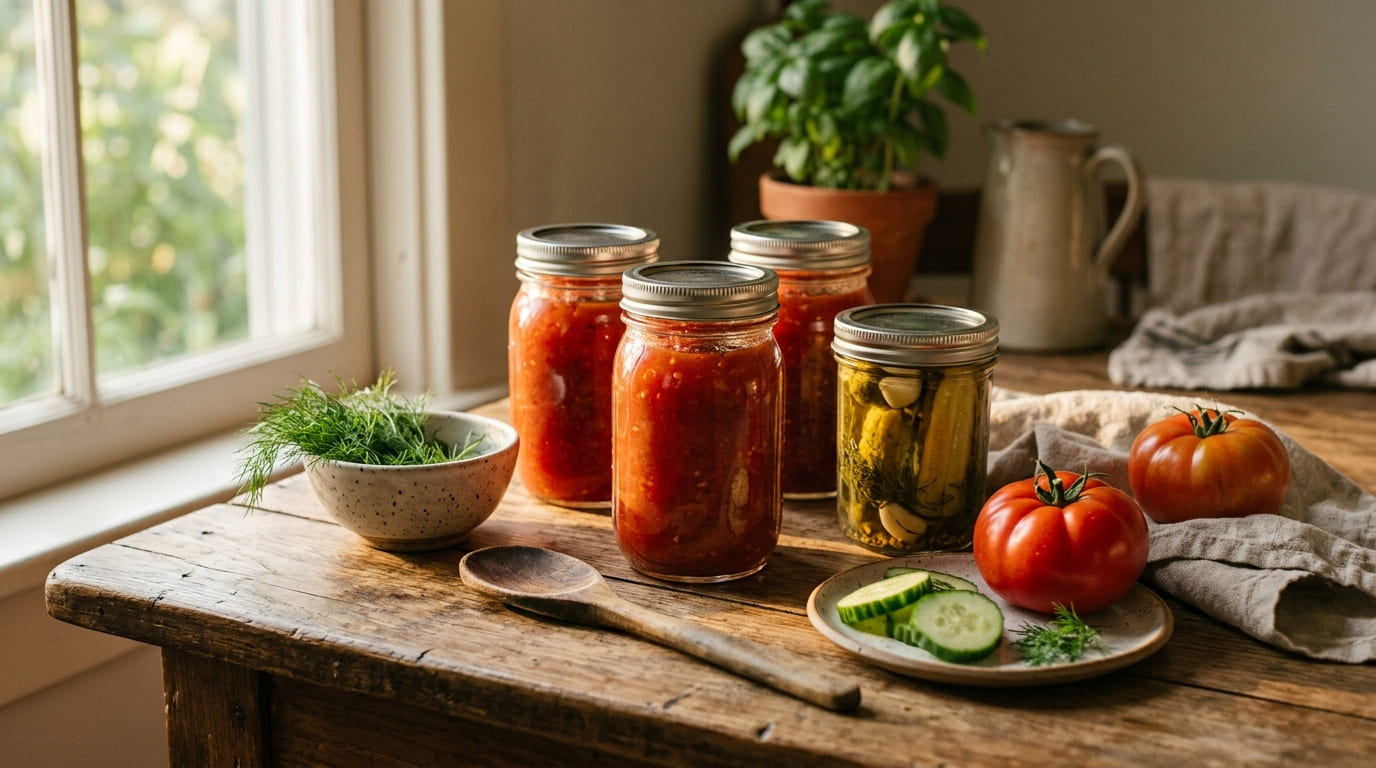
There’s a moment every home canner remembers: the first ping of a lid sealing shut. It’s a small sound, but it means something big — you just preserved food that will still be good in a year, without a freezer, without electricity, without a single preservative.
If you’ve been thinking about learning to can, this is your starting point. No overwhelm, no 40-quart stockpot you’ll use twice. Just the essentials: what equipment actually matters, the one safety rule you can never break, and a first recipe that’s almost impossible to mess up.
Why Start Canning in the First Place
Before we get into gear, it’s worth being clear about why canning is worth your weekend.
It saves money — eventually. A case of tomatoes in August costs a fraction of the same tomatoes in February. If you garden, canning is how you stop giving away zucchini and start eating it in January.
It gives you control. You choose the salt, the sugar, the variety. No mystery additives, no “natural flavors” hiding on the label.
It’s resilient. A pantry of home-canned goods doesn’t care if the power goes out. It doesn’t care if grocery prices spike. It’s food security you built with your own hands — which is the same reason so many people are quietly rebuilding their home food supply right now.
It’s a skill that compounds. The first batch is slow. The fifth batch is muscle memory. By the tenth, you’re the person your friends call when they have too many peaches.
And here’s the honest part: canning is not hard, but it is unforgiving of shortcuts. The good news is that once you know the rules, they never change.
The Only Two Methods You Need to Know
There are exactly two safe ways to can food at home. Pick the wrong one and you risk botulism — a rare but serious hazard that has no smell, no taste, and no visible sign.
Here’s the short version. We go much deeper in our full comparison of water bath vs pressure canning, but this is what you need to start:
Water bath canning is for high-acid foods. Think jams, jellies, pickles, salsa, tomatoes with added lemon juice, and most fruit. The boiling water reaches 212°F, which is enough to kill the organisms that spoil high-acid food — but not enough to kill the spores that cause botulism.
Pressure canning is for low-acid foods. Think green beans, corn, carrots, soups, stews, and meat. Only a pressure canner reaches 240°F, the temperature required to destroy botulism spores.
The rule is simple: if it’s low-acid, it must be pressure canned. There is no safe shortcut.
If you’re just starting, water bath canning is the gentler on-ramp. You can do it with a large pot you probably already own. Pressure canning requires a dedicated (and heavier) piece of equipment, which is why we wrote a whole guide to the best pressure canners for beginners.
Start with high-acid foods. Learn the rhythm. Add pressure canning when you’re ready.
Equipment: What You Actually Need (and What You Don’t)
The canning aisle at a farm store is designed to make you think you need everything. You don’t. Here’s the honest starter kit.
The Non-Negotiables
Jars. You need glass canning jars with two-piece lids (flat lid + screw band). Ball Wide-Mouth Mason Jars are the standard for a reason — they’re durable, widely available, and replacement lids are sold everywhere. Wide-mouth is easier to fill and clean, which matters more than you’d think on your first batch.
Ball Wide-Mouth Mason Jars (Quart 32 oz)
Best for: Canning, fermenting, and dry storage
- Classic, trusted brand
- Multi-purpose
- Widely available replacement lids
- Glass can break if mishandled
A large pot with a rack. For water bath canning, any deep pot works if the jars can be fully submerged with 1–2 inches of water on top, and if you have a rack to keep jars off the bottom. A dedicated water bath canner is convenient but not required for your first batch.
A jar lifter. Do not improvise with tongs. A jar lifter grips the neck of a hot jar safely. This is the one tool where the cheap version is fine — just get one.
A wide-mouth funnel. Ladling jam into a jar without a funnel is how you get jam on your ceiling. A $5 funnel pays for itself in the first ten minutes.
A bubble remover (or a chopstick). Air bubbles trapped in the jar can affect headspace and sealing. A plastic bubble remover is ideal; a clean chopstick works in a pinch.
Nice-to-Have, Not Required
- A canning rack for your existing pot — cheaper than a full canner.
- A magnetic lid lifter — handy for pulling sterilized lids out of hot water.
- A second pot — for keeping lids warm while you fill jars.
What You Don’t Need Yet
- A 40-quart pressure canner (start with water bath)
- A dedicated canning kitchen
- Every accessory in the catalog
Buy the minimum. Add tools when a specific batch frustrates you. That’s the real signal you need something.
Your First Recipe: Small-Batch Water Bath Pickles
This is the recipe we recommend for a first canning session. It’s high-acid (so water bath is safe), it’s fast, it’s forgiving, and the result is something you’ll actually eat.
Makes about 4 pint jars.
Ingredients
- 2 lbs pickling cucumbers, sliced into spears or coins
- 1 cup white vinegar (5% acidity — check the label)
- 1 cup water
- 1 tbsp pickling salt (not table salt — no anti-caking agents)
- 1 tsp dill seed
- 1 clove garlic per jar (optional)
- 1/2 tsp mustard seed per jar (optional)
Instructions
- Sterilize your jars. Wash them in hot soapy water, then keep them hot in a 200°F oven or a pot of simmering water until you’re ready to fill. Lids go in a small pot of hot (not boiling) water.
- Make the brine. Combine vinegar, water, and salt in a saucepan. Bring to a boil, stirring until salt dissolves.
- Pack the jars. Add dill, garlic, and mustard seed to each jar. Pack cucumber spears tightly, leaving 1/2 inch of headspace.
- Fill with brine. Pour hot brine over cucumbers, still leaving 1/2 inch headspace. Run a bubble remover around the inside of the jar to release trapped air.
- Wipe the rims. A clean rim is a sealing rim. Use a damp paper towel.
- Add lids and bands. Finger-tight — not gorilla-tight. Air needs to escape during processing.
- Process in a water bath. Jars must be covered by 1–2 inches of water. Bring to a full rolling boil, then start your timer: 10 minutes for pints (adjust for altitude — add 5 minutes per 1,000 ft above 1,000 ft).
- Cool undisturbed. Turn off heat, remove the pot lid, and let jars sit in the hot water for 5 minutes. Then transfer to a towel-lined counter. Do not tilt, poke, or move them for 12–24 hours.
- Check the seal. Press the center of each lid. If it doesn’t flex, it’s sealed. If it pops, refrigerate that jar and eat it within a few weeks.
That’s it. You just canned.
The Safety Rules You Cannot Break
Canning has a reputation for being fussy. It’s not fussy — it’s specific. These rules exist because people have gotten seriously ill ignoring them.
1. Never water bath a low-acid food. Green beans, corn, carrots, meat, soups — pressure canner only. No exceptions for “old family recipes.”
2. Follow tested recipes. USDA-tested recipes from Ball, the National Center for Home Food Preservation, or a reputable modern canning book. Grandma’s recipe from 1952 may not reflect current safety standards.
3. Check your acidity. Vinegar must be 5% acidity. Tomatoes need added lemon juice or citric acid unless the recipe says otherwise. Don’t assume.
4. Respect headspace. Too little and contents boil over, preventing a seal. Too much and the seal may fail. Use the measurement the recipe gives you.
5. Never reuse flat lids. Bands are reusable; flat lids are single-use. A used lid may not seal.
6. Don’t invent processing times. Use tested times. Altitude adjustments are not optional.
7. When in doubt, throw it out. A bulging lid, a foul smell, spurting liquid, or mold means the jar is unsafe. Do not taste it. Discard it.
If you learn nothing else, learn rule #1. It’s the one that separates safe canning from dangerous canning.
Beyond Canning: A Low-Tech Alternative Worth Knowing
Canning isn’t the only way to preserve food — and for some foods, it’s not even the best one.
Fermentation is the oldest preservation method in the world, and it requires almost no equipment. A jar, salt, and time. For beginners who want to preserve vegetables without heat or pressure, it’s a natural companion skill to canning.
The simplest entry point is an airlock lid system like Masontops Pickle Pipes — they fit standard mason jars and let fermentation gases escape without letting air in, so you don’t have to “burp” the jar daily.
Masontops Pickle Pipes Airlock Fermentation Lids
Best for: Beginners starting with sauerkraut, kimchi, or pickles
- Simple airlock design
- Fits standard mason jars
- No burping required
- Only for fermentation, not canning
A jar of fermented sauerkraut or pickles sits alongside your canned goods as a different kind of pantry insurance — one that adds probiotics instead of removing them. It’s not a replacement for canning, but it’s a skill worth having in the same toolkit.
Frequently Asked Questions
Do I need a pressure canner to start? No. Start with water bath canning and high-acid foods. Add pressure canning when you want to preserve low-acid vegetables, soups, or meat.
Can I use any pot for water bath canning? Yes, as long as jars are fully submerged with 1–2 inches of water on top and a rack keeps them off the bottom. A dedicated canner is more convenient but not required.
How long do home-canned goods last? Properly sealed and stored in a cool, dark place, most home-canned goods keep for 12–18 months. Quality declines after that, but safety generally holds if the seal is intact.
What if a jar doesn’t seal? Refrigerate it and eat it within a few weeks. Don’t reprocess it — the texture will suffer.
Is canning safe for beginners? Yes, if you follow tested recipes and the two-method rule. The danger comes from improvising, not from canning itself.
Can I can in an Instant Pot? No. Electric multi-cookers are not pressure canners and do not reach or regulate the required temperatures. Use a stovetop pressure canner for low-acid foods.
What’s the easiest food to can first? Pickles, jam, or applesauce. All are high-acid, forgiving, and satisfying.
Where to Go From Here
You now have everything you need for your first batch: the two methods, the starter equipment, a recipe, and the safety rules.
The next step is picking your method with confidence. If you’re still unsure whether a recipe calls for water bath or pressure canning, our guide to water bath vs pressure canning walks through the decision with a simple flowchart and a tomato exception table.
And if you’re ready to add low-acid foods to your repertoire, our roundup of the best pressure canners for beginners covers the two models we recommend most.
If you want to go deeper into the why behind canning — building a pantry that can feed your family through anything — the complete guide to home food preservation is the place to start. [Coming soon: /preservation/complete-guide/]
One more thing. Canning is one pillar of a resilient kitchen. If you’re interested in the broader picture — the foods, methods, and habits that keep a household fed when supply chains get weird — the people behind The Lost SuperFoods have put together a guide that pairs well with what you’re learning here. It’s a paid resource, not a requirement, but it’s worth a look if this topic has its hooks in you.
Start with Ball Wide-Mouth Mason JarsYour first jar is the hardest. After that, it’s just Tuesday.