Water Bath vs Pressure Canning: Which Method Should You Use?
Water bath or pressure canning? Pick wrong and you risk spoiled food — or worse. Here's the simple rule that tells you exactly which method every jar needs.
Disclosure: This post contains affiliate links. As an Amazon Associate, we earn from qualifying purchases at no extra cost to you. We only recommend products we believe are genuinely useful for home food preservation.
If you’ve spent any time reading about home canning, you’ve run into the same fork in the road: water bath or pressure canning?
Most beginners pick one and hope for the best. That’s a mistake — not because one method is “better,” but because the two methods are not interchangeable. They exist for different reasons, and using the wrong one can turn a shelf of beautiful jars into a batch of spoiled food.
The good news: once you understand the one rule that separates them, you’ll never have to guess again.
Let’s break it down.
The One Rule That Decides Everything
Here it is, in a single sentence:
High-acid foods go in a water bath canner. Low-acid foods go in a pressure canner.
That’s it. That’s the whole game.
Everything else — equipment, time, temperature, cost — flows from that one distinction. So let’s talk about why that rule exists, because understanding the “why” is what keeps you safe.
Why Acidity Matters More Than You Think
The enemy in home canning isn’t mold or yeast. It’s Clostridium botulinum — the bacteria that produces botulism toxin.
Botulinum spores are everywhere: in soil, on produce, in the air. They’re harmless when you eat them raw because your stomach acid and competing bacteria keep them in check. But seal them in a jar with low-acid food and no oxygen, and you’ve created their ideal environment.
Here’s the catch: botulinum spores survive boiling water. Water boils at 212°F (100°C) at sea level. Botulinum spores can survive up to 240°F (116°C). So a water bath canner — which maxes out at 212°F — cannot kill them.
A pressure canner, on the other hand, raises the boiling point of water. At 10–15 PSI, water boils at 240–250°F. That’s hot enough to destroy botulinum spores.
But here’s the twist: botulinum spores can’t grow in high-acid environments. Below a pH of 4.6, they’re inert. So if your food is acidic enough, you don’t need to kill the spores — you just need to kill the active bacteria, yeast, and mold, which water bath canning does easily.
That’s why the rule exists. It’s not tradition. It’s microbiology.
Water Bath Canning: What It Is and When to Use It
Water bath canning is the simpler, older, more forgiving method. You fill jars, submerge them in boiling water, and process them for a set time. The boiling water transfers heat into the jar, killing spoilage organisms and creating a vacuum seal as the jar cools.
Use water bath canning for high-acid foods (pH 4.6 or below):
- Fruits and fruit juices
- Jams, jellies, and fruit preserves
- Tomatoes with added acid (lemon juice or citric acid — more on this below)
- Pickles and chutneys (vinegar raises acidity)
- Salsa (if the recipe is tested and acidified)
- Sauerkraut and other fermented foods (already acidic)
What you need:
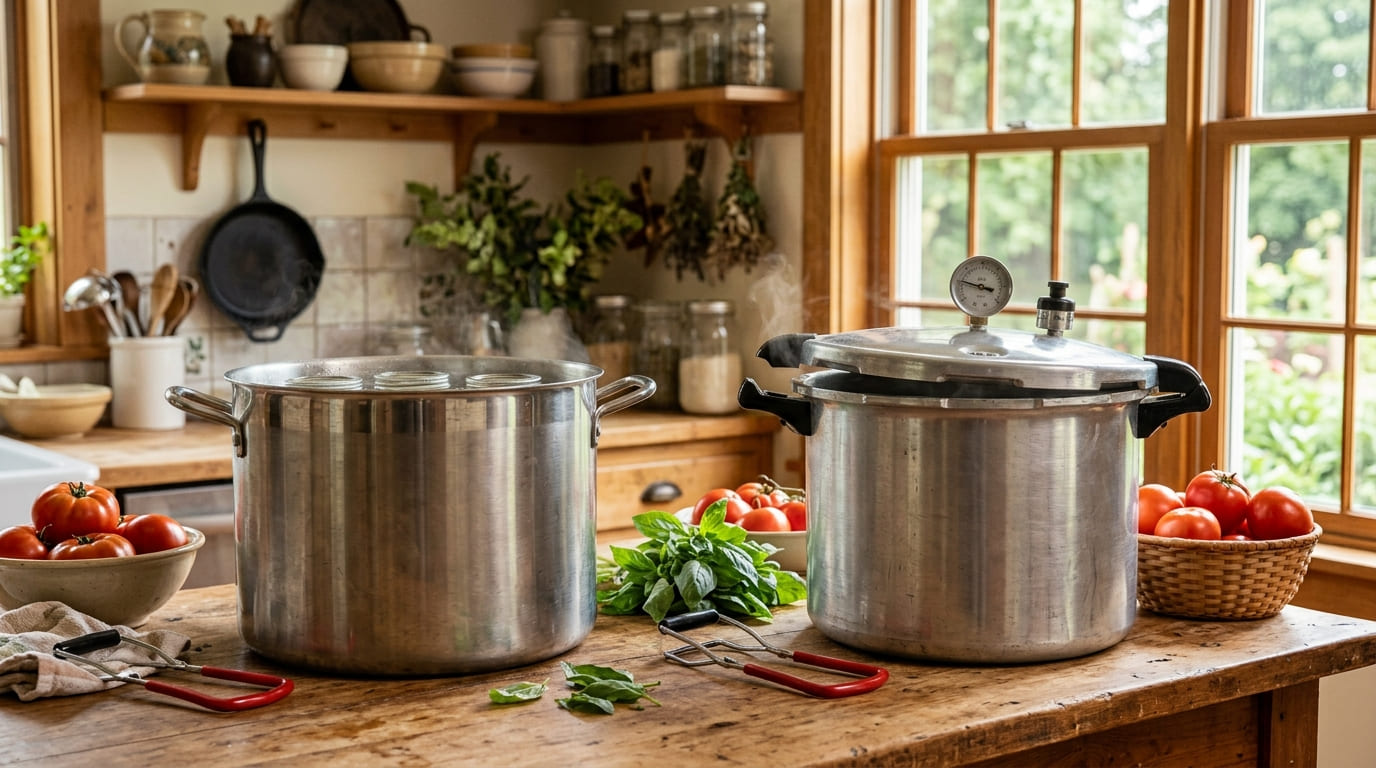
- A large pot with a lid and a rack (a stockpot works if it’s tall enough)
- Glass mason jars with two-piece lids
- A jar lifter
- A bubble remover or wooden chopstick
That’s it. You don’t need special equipment. A basic water bath setup costs less than $40 if you already own a big pot.
Typical processing time: 10–45 minutes, depending on jar size and altitude.
Pressure Canning: What It Is and When to Use It
Pressure canning uses a sealed, heavy-duty pot that builds internal pressure. That pressure raises the boiling point of water, which raises the processing temperature above 240°F — hot enough to destroy botulinum spores.
It’s more involved. You have to monitor pressure, adjust for altitude, and follow recipes precisely. But for low-acid foods, it’s the only safe method.
Use pressure canning for low-acid foods (pH above 4.6):
- Vegetables (green beans, corn, carrots, beets, potatoes)
- Meats and poultry
- Fish and seafood
- Soups, stews, and stocks
- Beans and legumes
- Tomato products without added acid
What you need:
- A pressure canner (not a pressure cooker — they’re different)
- Glass mason jars with two-piece lids
- A jar lifter
- A weighted gauge or dial gauge
- A timer
A pressure canner is a bigger investment. The Presto 01781 23-Quart Pressure Canner — the model most beginners start with — runs about $165, and it doubles as a water bath canner, so you only need one pot for everything.
Typical processing time: 20–90 minutes, plus 10 minutes of venting and depressurization time.
The Tomato Exception (Read This Carefully)
Tomatoes are the classic “is it high-acid or low-acid?” question. The answer is: it depends.
Modern tomato varieties are less acidic than they were a few generations ago — breeding for sweetness and lower acid has changed the pH. The USDA now recommends adding acid to all tomato products before water bath canning, even varieties you remember your grandmother canning without it.
Here are the exact amounts:
| Jar Size | Bottled Lemon Juice | Citric Acid |
|---|---|---|
| Pint | 1 tablespoon | ¼ teaspoon |
| Quart | 2 tablespoons | ½ teaspoon |
Add the acid directly to the jar before filling with tomatoes — not to the pot. This ensures every jar gets the correct amount.
Use bottled lemon juice, not fresh. This is the part most beginners miss. Fresh lemons vary in acidity from fruit to fruit — sometimes significantly. Bottled lemon juice has a standardized acidity (usually 5% citric acid), which is exactly what the USDA rule is designed around. A “juicy lemon” from your neighbor’s tree might be less acidic than the recipe assumes, and that variability is how botulism outbreaks happen.
If you add acid, tomatoes can be water bath canned.
If you don’t add acid — or if you’re canning tomatoes with low-acid ingredients like onions, peppers, or garlic — you need a pressure canner.
This is not a suggestion. It’s a safety rule. Botulism outbreaks from home-canned tomatoes are rare but they happen, and they almost always trace back to skipped acidification.
Side-by-Side Comparison
| Factor | Water Bath Canning | Pressure Canning |
|---|---|---|
| Foods | High-acid only | Low-acid and high-acid |
| Temperature | 212°F (100°C) | 240–250°F (116–121°C) |
| Kills botulinum spores? | No | Yes |
| Equipment cost | $20–$40 (basic pot) | $100–$300+ |
| Learning curve | Easy | Moderate |
| Processing time | 10–45 min | 20–90 min |
| Altitude adjustment | Yes (add time) | Yes (adjust pressure) |
| Doubles as other method? | No | Often yes (Presto, All-American) |
| Best for beginners? | Yes — start here | Yes — but learn first |
Which One Should You Buy First?
If you’re just starting out, here’s the honest answer: buy a pressure canner that can also do water bath canning.
Why? Because a dedicated water bath pot is cheap, but a pressure canner covers everything. You’ll eventually want to can vegetables, soups, or meat — and when that day comes, you don’t want to buy a second pot.
The Presto 01781 23-Quart Pressure Canner and Cooker">Presto 01781 23-Quart Pressure Canner is the standard recommendation for beginners. It’s USDA-recommended for low-acid foods, doubles as a boiling-water canner for fruits and pickles, and works on both regular and smooth-top ranges. It’s also Amazon’s Choice in its category, which says something about how many home canners rely on it.
If you have a small kitchen or prefer not to babysit a stovetop, the NESCO NPC-9 Smart Electric Pressure Canner">NESCO NPC-9 Smart Electric Pressure Canner is the electric alternative. It automates pressure and temperature control, which removes most of the “am I doing this right?” anxiety. The trade-off is capacity — 9.5 quarts versus 23 — and a higher price.
And regardless of which canner you choose, you’ll need jars. Ball Wide-Mouth Mason Jars (Quart 32 oz)">Ball Wide-Mouth Mason Jars are the industry standard: trusted brand, multi-purpose, and replacement lids are available everywhere.
Presto 01781 23-Quart Pressure Canner and Cooker
Best for: Beginners who want a reliable, USDA-recommended stovetop canner
- USDA-recommended method for low-acid foods
- Doubles as boiling-water canner for fruits and pickles
- Works on regular and smooth-top ranges
- Amazon's Choice
- Requires manual pressure monitoring
- Heavy when filled
A Note on Equipment You Don’t Need
You’ll see a lot of gadgets marketed to home canners. Most are optional. A few are genuinely useful:
- Jar lifter — essential, not optional. Do not try to lift hot jars with tongs.
- Bubble remover — a wooden chopstick works fine. Don’t buy a dedicated tool unless you can it often.
- Canning rack — keeps jars off the bottom of the pot. Most canners include one.
- Funnel — makes filling jars cleaner. A $3 plastic funnel works.
What you don’t need: specialty jar-cleaning brushes, magnetic lid lifters, or “canning kits” that bundle things you’ll never use.
Common Beginner Mistakes (and How to Avoid Them)
1. Using a pressure cooker instead of a pressure canner. They are not the same. Pressure cookers (like Instant Pot) don’t reach or hold the pressure needed for safe canning. The USDA explicitly warns against this.
2. Skipping the acid in tomatoes. Already covered — but it’s the #1 cause of avoidable canning failures.
3. Not adjusting for altitude. Water boils at a lower temperature at higher altitudes. If you live above 1,000 feet, you need to add processing time (water bath) or increase pressure (pressure canning). Your recipe should include an altitude chart.
4. Reusing lids. Two-piece lids are single-use for the flat disc. The ring can be reused, but the lid that seals cannot.
5. Cooling jars too fast. Let jars cool naturally on a towel-lined counter for 12–24 hours. Don’t put them in the fridge or run them under cold water — thermal shock can crack glass or break the seal.
6. Testing the seal too soon. Wait 12–24 hours. Then press the center of the lid — if it doesn’t flex, it’s sealed. If it flexes, refrigerate the jar and use it within a few days.
FAQ
Can I use a water bath canner for low-acid foods if I process them longer? No. Time doesn’t fix temperature. Water bath canning cannot exceed 212°F, and botulinum spores survive that. Low-acid foods must be pressure canned.
Do I need a pressure canner for pickles? No — pickles are high-acid because of the vinegar. Water bath canning is correct for pickles.
Can I pressure can jams and jellies? Technically yes, but it’s unnecessary and can overcook them. Water bath canning is the standard for high-acid foods.
Is an electric pressure canner as safe as a stovetop one? If it’s a USDA-approved electric pressure canner (like the NESCO NPC-9), yes. But “electric pressure cooker” and “electric pressure canner” are not the same thing. Check the manufacturer’s canning certification.
How long do home-canned goods last? Properly sealed and stored in a cool, dark place: 12–18 months for best quality, longer for safety. Always check the seal before opening.
What if a jar didn’t seal? Refrigerate it and use within a few days. Don’t reprocess — the texture will suffer. You can also freeze the contents if the jar is freezer-safe.
The Bottom Line
The choice between water bath and pressure canning isn’t about preference or tradition. It’s about pH.
High-acid foods → water bath. Low-acid foods → pressure canner. Tomatoes → acidify, then water bath. Or pressure can for safety margin.
If you’re building a home food supply that actually lasts, you’ll eventually want both methods in your toolkit. But if you’re starting with one piece of equipment, make it a pressure canner that can also handle water bath — that way you’re covered no matter what’s in your garden.
For a deeper look at how each method fits into a complete preservation strategy, see our guide on How to Build a More Resilient Home Food Supply. And if you’re ready to choose equipment, our breakdown of the Best Pressure Canners covers the models worth your money.
PreserveHarvest is reader-supported. When you buy through links on our site, we may earn an affiliate commission. As an Amazon Associate, we earn from qualifying purchases.
This article is for informational purposes only and is not a substitute for USDA canning guidelines. Always follow tested recipes from sources like the National Center for Home Food Preservation.